'86 carbs questions

VMAX  Forum

Help Support VMAX Forum:

This site may earn a commission from merchant affiliate links, including eBay, Amazon, and others.

naughtyG

Well-Known Member
Joined
Jul 31, 2008
Messages
6,436
Reaction score
13
Location
Freo, Western Australia
so yesterday I removed my carbs for inspection and cleaning, since I've been having all these idling and surge between 4-5k rpm problems. Bear in mind the bike's an '86, with 39,000 miles on the clock.

Had no problems doing so following Maleko's detailed instructions under 'changing your main jets' - thanks Mark! One thing I found an easier way to do - instead of puling up on the carbs to get them off the boots, it's a lot easier to wedge a piece of wood (I used my mallet's handle) between the carbs and cylinders heads and push up.

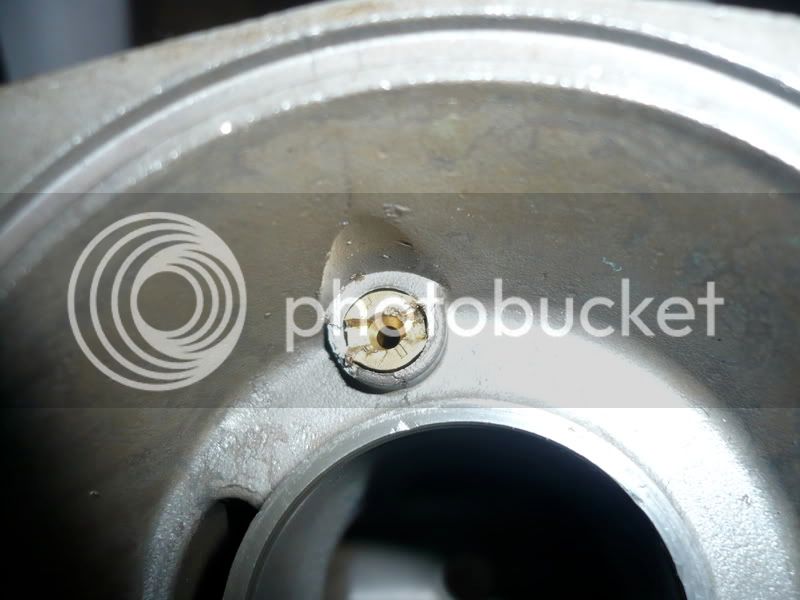
Looking at the underneath of my carbs on the bench, I noticed top right and bottom left look like they've been leaking (see attached pics). Upon removing the brass nuts (see pics) also noticed the o-rings look pretty shite. My main jets are marked '525' so I assume they are the stock 152.5 items?
I'm going to split the carbs up to clean them and break the fuel bowls open to check on my float levels - I need to see if this has anything to do with the surge problem I'm been experiencing when cruising between 4000 and 5000 rpm.
Please also remember that when I got the bike, the stock needles had been raised by .024" (0.56mm)

So my questions are:

- should I get a full carb rebuild kit or just those o'rings and bowl gaskets? What else will I need?

- should I get such kits or bits from Mondak or is there a better deal on fleaBay or such?

- considering that my motor, exhaust and airbox are all stock, but I run a K&N air filter (increased air flow?), and I ride mostly just above sea level (Florida), should I stick with the 152.5 jets or consider any size up or down?

- should I put those shims back on my needles or leave them out?


Thanks in advance for your input!
 

Attachments

  • mycarbs.jpg
    mycarbs.jpg
    97.7 KB · Views: 37
  • topleft.jpg
    topleft.jpg
    41.7 KB · Views: 18
  • topright.jpg
    topright.jpg
    59 KB · Views: 14
  • botleft.jpg
    botleft.jpg
    61.3 KB · Views: 13
  • botright.jpg
    botright.jpg
    43.3 KB · Views: 13
  • toprightsideview.jpg
    toprightsideview.jpg
    67.7 KB · Views: 20
  • bottomleftsideview.jpg
    bottomleftsideview.jpg
    71.9 KB · Views: 15
  • brassplugsorings.jpg
    brassplugsorings.jpg
    32.2 KB · Views: 18
My main jets are marked '525' so I assume they are the stock 152.5 items?

Yeah. The jets damage pretty easily so can wear the markings off if wrong size screwdriver is used.

I'm going to split the carbs up to clean them and break the fuel bowls open to check on my float levels - I need to see if this has anything to do with the surge problem I'm been experiencing when cruising between 4000 and 5000 rpm. Please also remember that when I got the bike, the stock needles had been raised by .024" (0.56mm)

I would check your coasting enricheners too. Make sure the plungers are clean and diaphragms don't have any tears or holes.

- should I get a full carb rebuild kit or just those o'rings and bowl gaskets? What else will I need?

I would, they're due for a rebuild just by looking at the main jet plug o-rings. There's a sticky in the carbs section on what you'll need for part.

- should I get such kits or bits from Mondak or is there a better deal on fleaBay or such?

Best price is probably through Gary McCoy at Mondak. I'm not confident in the Ebay kits.

- considering that my motor, exhaust and airbox are all stock, but I run a K&N air filter (increased air flow?), and I ride mostly just above sea level (Florida), should I stick with the 152.5 jets or consider any size up or down?

K&N allows more air flow but won't increase due to the air box being the restriction. I would keep your stock jets and try going w/o the shims after your rebuild/cleaning.
 
Not sure if anyone has mentioned this fix before to you but I had the same surging problem between 4 and 5 when cruising on the motorway. After months of trying different cleaning and adjusting on the carbs it turned out to be because I did not have any carb vent tubes fitted. If you do have vent tubes fitted it is important that the ends are covered so no can directly blow over them. I know it does not seem logical that a bit of tubing can have such an effect but believe me the differance after fitting these tubes was amazing. Hope this helps.
Alan.
 
maleko89 said:
I wouldn't worry about the needle seats. Just look at your needle valves and make sure the rubber tips look good and aren't oblong or anything.

When I rebuilt mine I did only the o-rings and gaskets. My slides are original and have almost 70,000 miles on them. If you jets look good re-use. Use a magnifying glass to look at the needle jet ends. Make sure the ends are round and not oblong as this would cause a rich problem.

hello again,

sorry to be such a pain, but I have a few more questions:

- I've examined my float needles, and think they're ok. I can see a faint line where they make contact with the seats, but are otherwise looking great. See the attached pic (best I could get) and tell me wot u think.

- Looking at my piston valves, the diaphragms look fine, but the pistons look lightly scratched. Is that a problem? Again, see the pics - both are of the same piston, one is with and one without flash.

- looking at my plungers - they all look the same to me. Again look at my pic, and tell me if you think I should replace those or not.

- last two pics - can you let me know if I should disturb these guys (one on each carb side) or not? The Yamaha service manual doesn't mention them at all, so wondered what you think?

Finally, if I don't buy rebuild kits, this is what I think I'll get:

- fuel bowl gasket x4
- jet block gasket x4
- needle jet o-ring x4
- main jet brass plug o-ring x4

Do you think I should get anything else? All the other o-rings I looked at so far seemed fine.

Thanks!!

PS - Strongbow, I checked my float bowl vent tubes, and they are all fine, fitted and routed properly, end ending in the metal fittings screwed to the airbox sides.
 

Attachments

  • floatneedle.jpg
    floatneedle.jpg
    21.2 KB · Views: 31
  • pistonflash.jpg
    pistonflash.jpg
    32.6 KB · Views: 30
  • pistonnoflash.jpg
    pistonnoflash.jpg
    34 KB · Views: 23
  • plunger1.jpg
    plunger1.jpg
    34.1 KB · Views: 25
  • plunger2.jpg
    plunger2.jpg
    34.4 KB · Views: 22
  • disturb1.jpg
    disturb1.jpg
    40.9 KB · Views: 31
  • disturb2.jpg
    disturb2.jpg
    40.4 KB · Views: 30
Needle valve looks fine. What i do is turn carb upside down with needle and float in place. Blow in fuel inlet and make sure you can't. Turn it right side up and you should be able to.

Normal for slides to be lightly scratched. You can take a fine emery cloth and clean 'em up and then clean with WD-40. Clean the slide bores too.

Plungers look good. I've never taken them all the way apart like you did. IF they aren't leaking they're good. When cleaning I pull the plunger open and the spray carb cleaner up in the vent hole up on top of each carb. Blow out with compressor too.

The first pic is coasting enrichener cover. Definitely inspect this piece. There's a small slide inside each one. To get to two of them you'll need to break the carb pairs into individuals unless you have a good tool to get at those screws. Inspect the C.E. diaphragms for rips/tears.

The last pic is the choke plunger housing. That's where you removed the plungers from correct?
 
- fuel bowl gasket x4
- jet block gasket x4
- needle jet o-ring x4
- main jet brass plug o-ring x4

Carefully check the jet block rubber plugs. Make sure no tears, cracks and they fit snugly in the jet block. Purge jet o-rings rarely go bad.

Oh, it's no bother so keep the questions coming. :)
 
Needle valve looks fine. What i do is turn carb upside down with needle and float in place. Blow in fuel inlet and make sure you can't. Turn it right side up and you should be able to.

Ok I'll try that thx. Won't bother with replacing the needle valves unless Gary comes up super cheap with the rebuild kits.

Normal for slides to be lightly scratched. You can take a fine emery cloth and clean 'em up and then clean with WD-40. Clean the slide bores too.
Yea I've been cleaning both pistons and bores with WD40 when I did the shotgun. Do I need to do the emery cloth or are they just fine left like this?
Plungers look good. I've never taken them all the way apart like you did. IF they aren't leaking they're good. When cleaning I pull the plunger open and the spray carb cleaner up in the vent hole up on top of each carb. Blow out with compressor too.
Gonna clean/blow every hole in the carbs as I go along. Good to know the plungers are ok - no leaks there that I could see.
The first pic is coasting enrichener cover. Definitely inspect this piece. There's a small slide inside each one. To get to two of them you'll need to break the carb pairs into individuals unless you have a good tool to get at those screws. Inspect the C.E. diaphragms for rips/tears.
Actually I've already broken up the carbs into 4, as I want to give them a full clean. Does this mean I will have to get new gaskets for these enrichener covers too?

The last pic is the choke plunger housing. That's where you removed the plungers from correct?
Yes indeed. You didn't say - should I open this up too or is it ok to leave it alone?
 
No, there aren't any gaskets under coasting enrichers covers. Just piston and spring.

Don't bother removing choke plungers. If they aren't leaking they're good. Just clean as outlined in peashooter method.
 
Ok, so I got them back together and all synced up again. Everything went well apart for one PAJ2 (in the last carb I did) that was already damaged, and when I attempted to remove it it broke some more and I don't think that one will ever come out again, short of drilling it..

Question - having cleaned it all up, where should I start as an initial setting for my A/F screws (sea level, stock exhaust, K&N air filter), and what method is best to find out if each is where it should be set at?

Right now, I have all four set at 2 1/4 turns out. If I try adjusting them, should I try doing one at a time, or all four in equal increments?

That's the only thing still confusing the hell outa me, as I can't see how to adjust one at a time and see any difference when there's another 3 going at the same time. I've also heard of the method of warming up, running to speed at WOT then hitting the kill switch and reading the plugs, but how accurate is this for fine adjustments?

I just want to make sure I'm not running too lean or too rich, but not 100% yet on how to get there..
 
2 1/2 is a good starting point. To adjust one at a time, turn all the way in until engine rpm lowers. Turn out slowly until engine tone recovers then turn an additional 1/2 turn. Repeat for other 3 screws.
 
2 1/2 is a good starting point. To adjust one at a time, turn all the way in until engine rpm lowers. Turn out slowly until engine tone recovers then turn an additional 1/2 turn. Repeat for other 3 screws.

Thanks for that Mark - I will do it when I get back to my bike at the weekend.

BTW - check out this pic of my dodgy PAJ2 - do you think it will affect anything? I sure hope not as there's no way that bugger is coming out, unless you have some magical way of doing it :confused2:

P1030740.jpg
 
It looks fine. I don't remove those to clean anyway. I remove the coastin enrichener and get everything clean from that side if necessary. If you want to remove it you can try an EZ out from Sears. Those things are awesome.
 
Hey Mark,

I just wanted to send a BIG THANKS :clapping:for all your help on rebuilding my carbs.

Been running the bike for a week since rebuilding now, and it runs great. I set all 4 A/F screws at 2 1/2 turns out as you recommended, and haven't gone back to play with them yet as it's running fine. It also cruises at 4-5k RPM no problem now, and I didn't put those needles shims back in.

You're da man!! :worthy:
 
Great! Glad to help out! I'm waiting for Lankee to send me his carbs so I can set his floats. It should be good for 10-12 hp.
 

Latest posts

Back
Top