


yukonerdave
Well-Known Member
So all this information is on here (or else i never would have been able to do this job), but I thought it'd be useful to collect it all in a single post. If anyone has done this with the newer forks, perhaps you could post a pic of anything that has to be done differently.
I'm assuming that you already have the forks removed - for tips on how to do this see Geek Law's front tire removal thread HERE. If you need more help to get the forks off after removing the wheel, just ask. Maybe I'll do another write up for that part later.
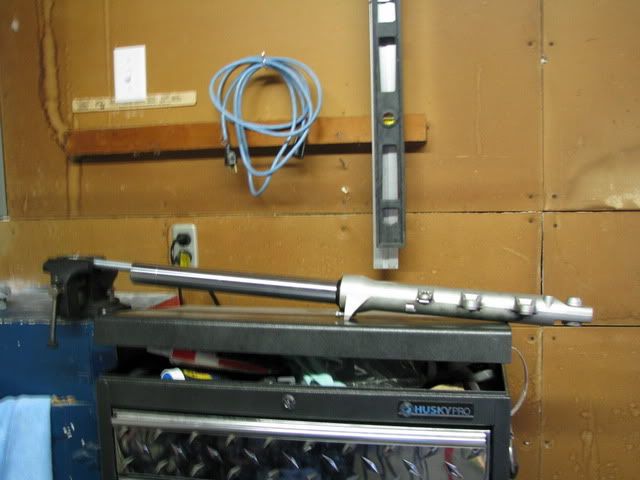
OK, so I will document the disassembly of my right fork, but the procedure is the same for both. Keep all the parts in separate locations if you are doing both at the same time. Fork, on its own, looks like this:

The air pressure should have already been released before removing the fork, but if you have the later forks you might not have done that yet. Do it. Next you want to drain the oil. Let it sit and drain for a while. It's prolly gonna get messy anyway, but let as much out as you can now. You'll probably notice all the oil spills on my garage floor - voice of experience here. The drain screw is located here:
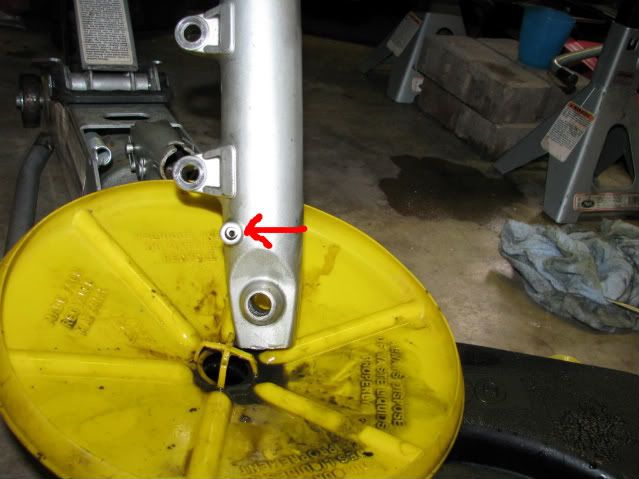
I've removed the screw and also the rubber washer because I'm hoping to get the sliders powder coated.
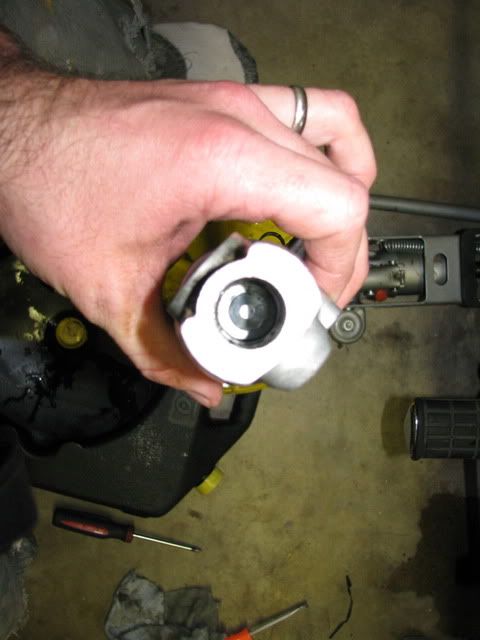
Here is the top of the fork:
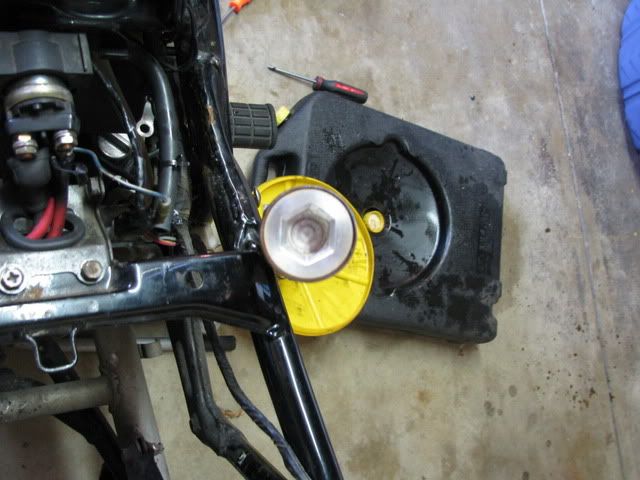
You will likely need to clamp it in a bench vise in order to loosen this top bolt. You'll also likely need to purchase something to get it out with. I used a bolt with a 17mm head, and a couple of nuts on the end:
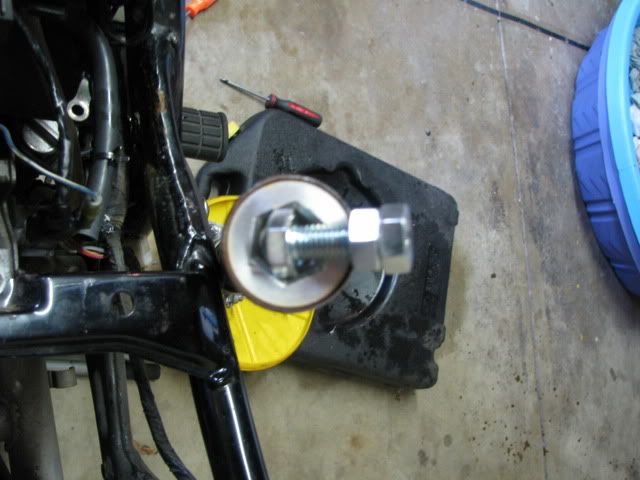
If you've got one, a 17mm Allen wrench would be perfect, but this setup worked great and was a whole lot cheaper.
Be VERY careful when removing this bolt. There is a big spring right under it pressing up with a lot of force. I wasn't quite ready for it on the first fork and it scared the crap out of me when it popped. I was more ready the second time, propping the head under something to support it:
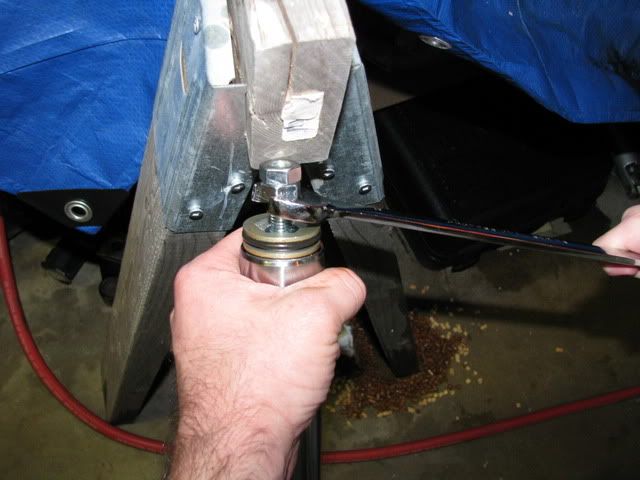
"Hey, Dad, how come the floor is so slippery???"

Ok here's what you have once the top bolt is off:

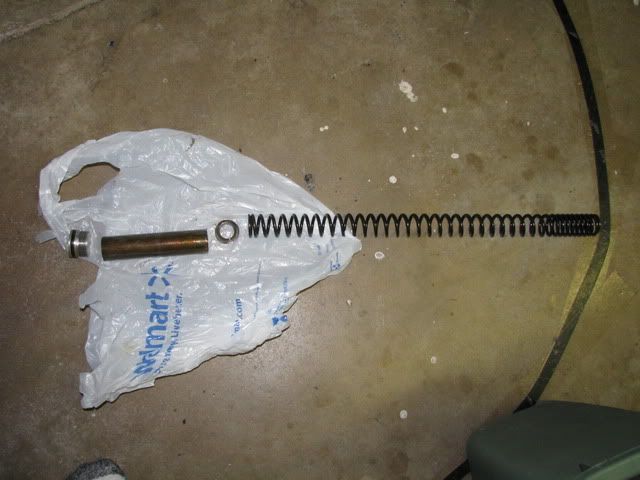
Set the bolt, spacer, and spring cover aside and pull the spring right out. Here's what you have:
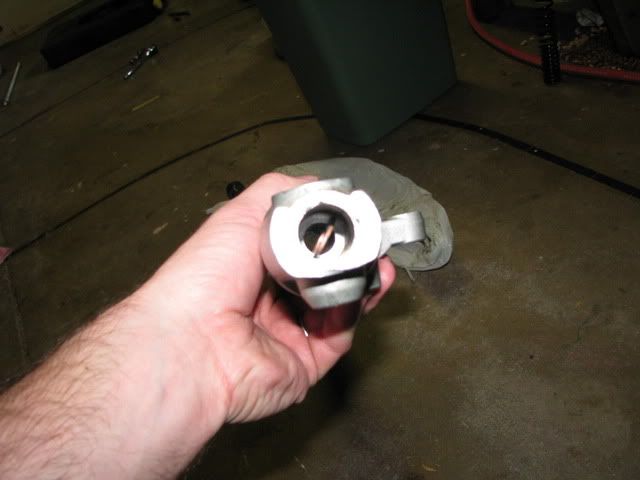
Ok, Piece of Cake so far. Here comes the tricky part. There is a 10mm allen bolt in the bottom of the fork:
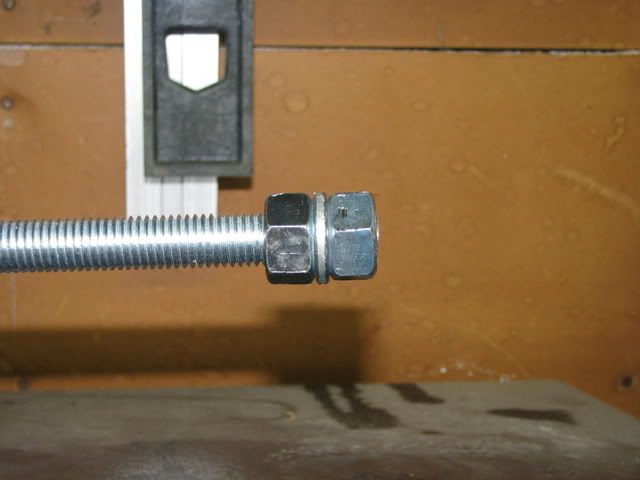
It is threaded into a damper rod inside the slider, and the problem is that more often than not when you turn the bottom bolt you just turn the rod inside the slider. So you gotta grasp the end of the rod in order to turn the bolt out. Fortunately, the top end of the rod has a 24mm hex head. Go to a hardware store and buy a 2 ft long threaded rod with two nuts and a lock washer for each side. I went to a Rural King and they didn't have what I needed in metric so I got the closest imperial sizes. Worked great. Here's what it looks like:
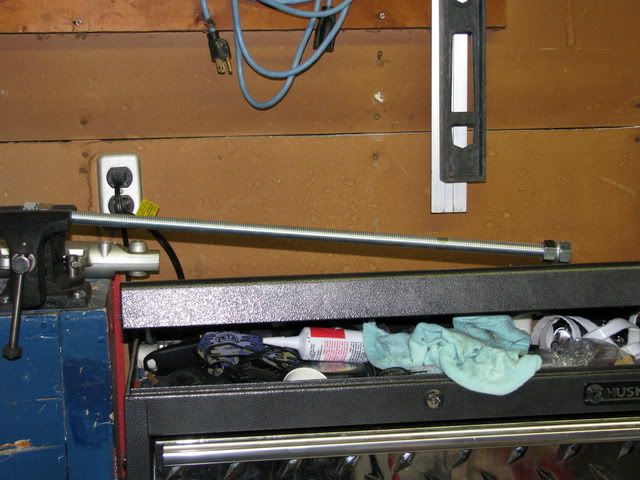
I actually took a big pipe wrench to each nut and tightened them together with everything I had. If they are not tight enough, there is a chance that you will just end up spinning the nuts on your threaded rod.
Clamp one end into a vise like in the picture then slide the fork tube onto the other end. You should feel the damper rod sit into the nut on the other end.
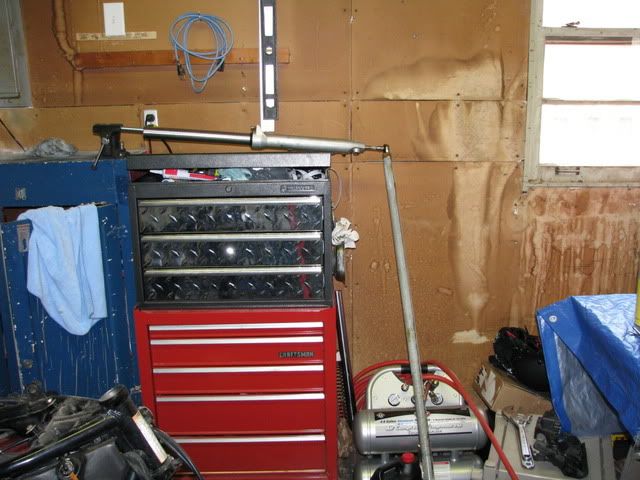
Now you need a 10mm allen wrench, or ratchet attachment with an extension, to get at the bottom damper rod bolt:

The bolt on my first fork came out real easy just like this. I used the ratchet shown and it didn't even take a whole lot of pressure. The second one, on the other hand, was much more stubborn. I had to retighten the nuts on my threaded rod a couple of times, tried banging on it with an electric impact driver, and muscled it with a ratchet, but no luck. Here's how I ended up loosening the bolt:
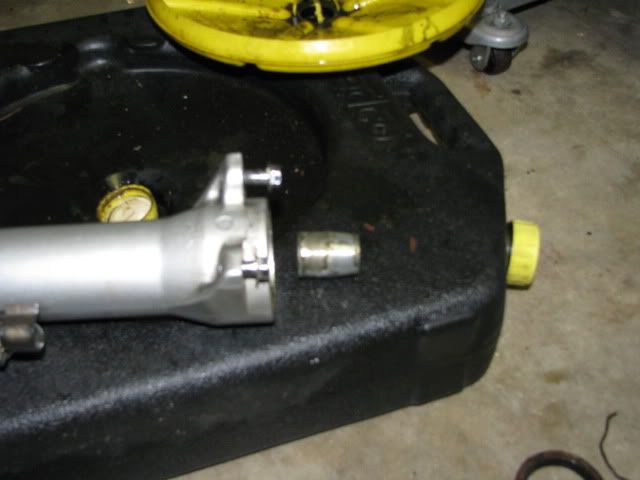
That's a 4 ft metal pipe I used as an extension on the ratchet - these guys can be TIGHT! OK, so once you have the bolt out, make sure you also get the sealing washer. Sometimes it gets stuck:
Now the damper rod should fall out of the top of the fork tube. If it doesn't want to fall, you may need to bang the tube on a block of wood a little to persuade it. Here's what you should have:
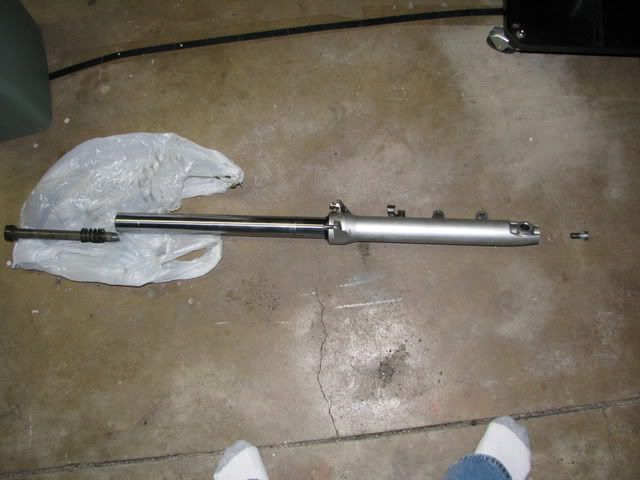
(From left to right): Damper rod, Rod spring, fork tube and slider (still attached), sealing washer (look closely), and damper rod bolt. Now we can remove the oil seal. Start by prying off the dust seal with a small screwdriver:
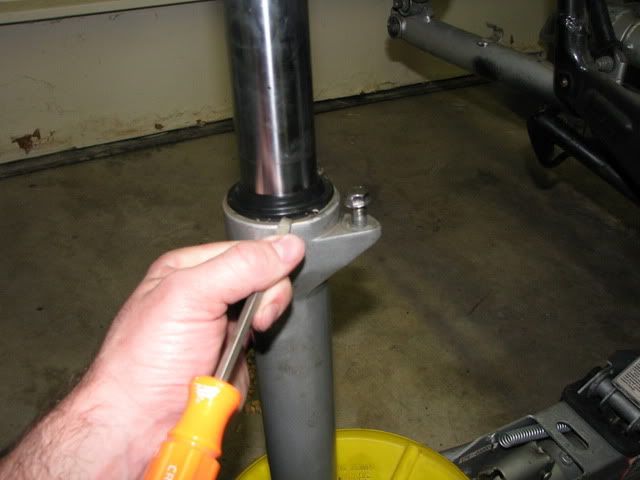
With that off, you should be able to see a metal retaining clip holding in the oil seal. The clip can be pried up with a screwdriver. Mine was all rusted out and gross looking - good thing I'm replacing everything!
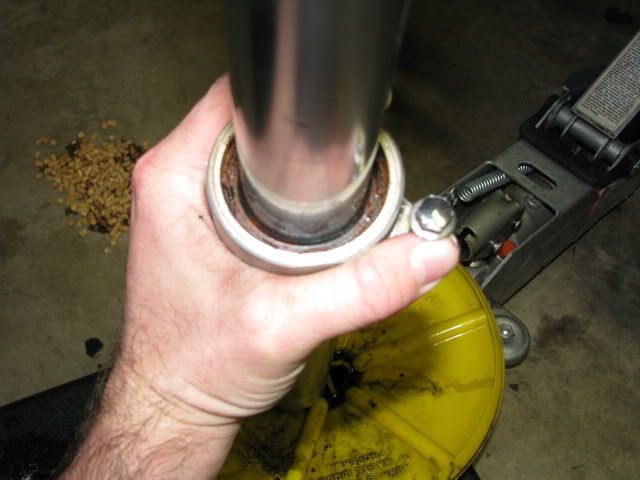
With the retaining clip off you can slide the fork tube down into the slider, and then sharply pull it up (like a slide hammer). Do this a couple of times until the oil seal, washer, and lower bushing come off:

Sorry for the lousy pic on this one - all I got. You can now separate the fork tube from the slider, and replace the oil and dust seals. Remember to get the damper rod seat, which should still be in the bottom of the slider (or maybe attached to the bottom of the fork tube:
You're done disassembling the fork! Time to clean up...
I'm assuming that you already have the forks removed - for tips on how to do this see Geek Law's front tire removal thread HERE. If you need more help to get the forks off after removing the wheel, just ask. Maybe I'll do another write up for that part later.
OK, so I will document the disassembly of my right fork, but the procedure is the same for both. Keep all the parts in separate locations if you are doing both at the same time. Fork, on its own, looks like this:
The air pressure should have already been released before removing the fork, but if you have the later forks you might not have done that yet. Do it. Next you want to drain the oil. Let it sit and drain for a while. It's prolly gonna get messy anyway, but let as much out as you can now. You'll probably notice all the oil spills on my garage floor - voice of experience here. The drain screw is located here:
I've removed the screw and also the rubber washer because I'm hoping to get the sliders powder coated.
Here is the top of the fork:
You will likely need to clamp it in a bench vise in order to loosen this top bolt. You'll also likely need to purchase something to get it out with. I used a bolt with a 17mm head, and a couple of nuts on the end:
If you've got one, a 17mm Allen wrench would be perfect, but this setup worked great and was a whole lot cheaper.
Be VERY careful when removing this bolt. There is a big spring right under it pressing up with a lot of force. I wasn't quite ready for it on the first fork and it scared the crap out of me when it popped. I was more ready the second time, propping the head under something to support it:
"Hey, Dad, how come the floor is so slippery???"
Ok here's what you have once the top bolt is off:
Set the bolt, spacer, and spring cover aside and pull the spring right out. Here's what you have:
Ok, Piece of Cake so far. Here comes the tricky part. There is a 10mm allen bolt in the bottom of the fork:
It is threaded into a damper rod inside the slider, and the problem is that more often than not when you turn the bottom bolt you just turn the rod inside the slider. So you gotta grasp the end of the rod in order to turn the bolt out. Fortunately, the top end of the rod has a 24mm hex head. Go to a hardware store and buy a 2 ft long threaded rod with two nuts and a lock washer for each side. I went to a Rural King and they didn't have what I needed in metric so I got the closest imperial sizes. Worked great. Here's what it looks like:
I actually took a big pipe wrench to each nut and tightened them together with everything I had. If they are not tight enough, there is a chance that you will just end up spinning the nuts on your threaded rod.
Clamp one end into a vise like in the picture then slide the fork tube onto the other end. You should feel the damper rod sit into the nut on the other end.
Now you need a 10mm allen wrench, or ratchet attachment with an extension, to get at the bottom damper rod bolt:
The bolt on my first fork came out real easy just like this. I used the ratchet shown and it didn't even take a whole lot of pressure. The second one, on the other hand, was much more stubborn. I had to retighten the nuts on my threaded rod a couple of times, tried banging on it with an electric impact driver, and muscled it with a ratchet, but no luck. Here's how I ended up loosening the bolt:
That's a 4 ft metal pipe I used as an extension on the ratchet - these guys can be TIGHT! OK, so once you have the bolt out, make sure you also get the sealing washer. Sometimes it gets stuck:
Now the damper rod should fall out of the top of the fork tube. If it doesn't want to fall, you may need to bang the tube on a block of wood a little to persuade it. Here's what you should have:
(From left to right): Damper rod, Rod spring, fork tube and slider (still attached), sealing washer (look closely), and damper rod bolt. Now we can remove the oil seal. Start by prying off the dust seal with a small screwdriver:
With that off, you should be able to see a metal retaining clip holding in the oil seal. The clip can be pried up with a screwdriver. Mine was all rusted out and gross looking - good thing I'm replacing everything!
With the retaining clip off you can slide the fork tube down into the slider, and then sharply pull it up (like a slide hammer). Do this a couple of times until the oil seal, washer, and lower bushing come off:
Sorry for the lousy pic on this one - all I got. You can now separate the fork tube from the slider, and replace the oil and dust seals. Remember to get the damper rod seat, which should still be in the bottom of the slider (or maybe attached to the bottom of the fork tube:
You're done disassembling the fork! Time to clean up...
 unk:
unk: