


RaWarrior
Well-Known Member
I realize this is stupid easy for any experienced mechanic or rider, but the first time I went to make an adjustment, I'd never done anything with a CV style carb before, and couldn't find any resource here on how to actually do it. So here's a quick write up with some pictures I snagged last time I adjusted mine, trying to dial in the stage 1 kit. These were from a phone camera in a poorly lit garage, so excuse the less than perfect quality.
Adjusting your needles is a good way to pinpoint your adjustments on the midrange of the bike, from around 3-6000 RPM or so. If you have problems focused in this area like bogging or hesitation, this is a good place to start.
I do these one carb at a time. So you have to repeat this process four times in all. Once you've done it a couple times, you can do all four in 15 minutes.
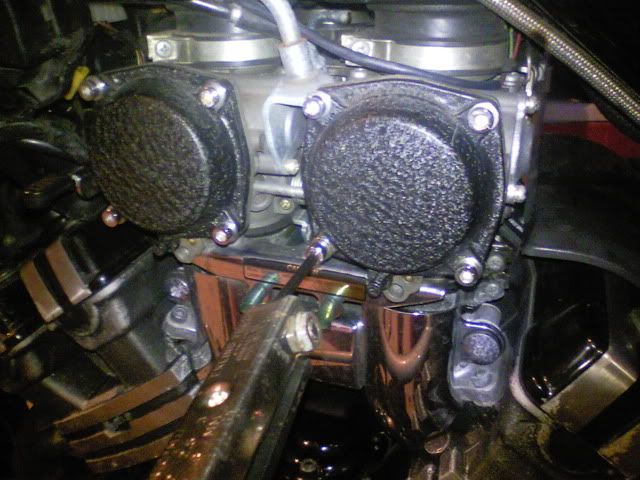
Start by removing both scoops, this makes the top two bolts much easier to get at.
Remove diaphragm cover. The bolts on mine took a 4mm hex key. I believe stock bikes have one anti-tamper screw, which you might have to vise-grip off if you don't have a bit for it. As you loosen the last bolt on the cover, hold it in place with a finger. There's a big spring behind it and a little bit of tension.
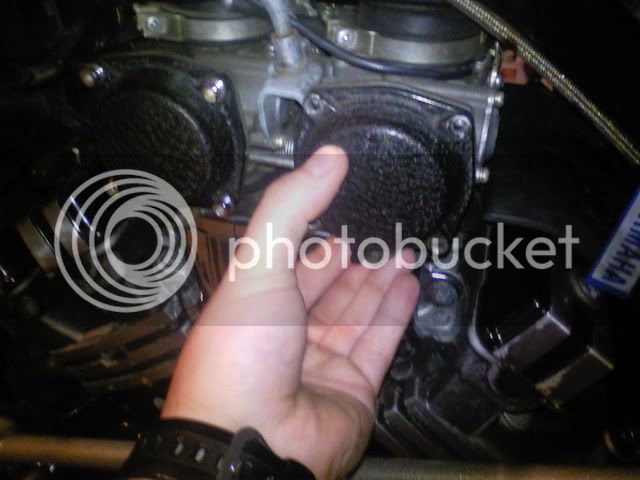
As you remove the cover, hold one hand like a cup underneath it. This is to catch the o-ring in case it falls out. On my bike none of them have ever fallen out, but on my Yamaha snowmobile they always fall out, so it's kind of hit and miss. If you re-assemble without the o-ring you'll have all sorts of problems, so take care not to lose it.
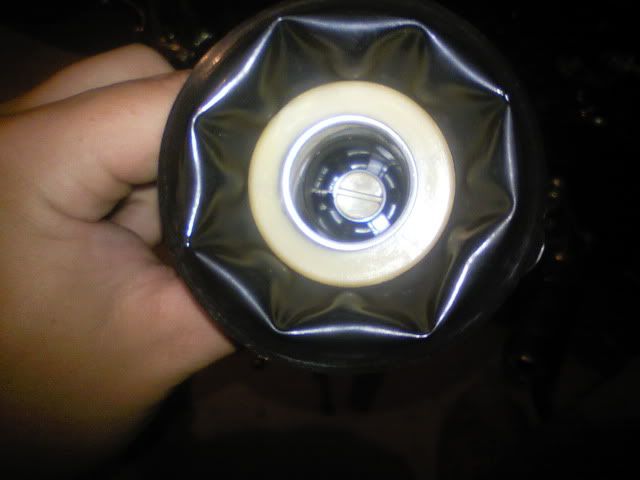
After the cover is removed, this is what you'll see. Note the o-ring is still in place here on the carb body.
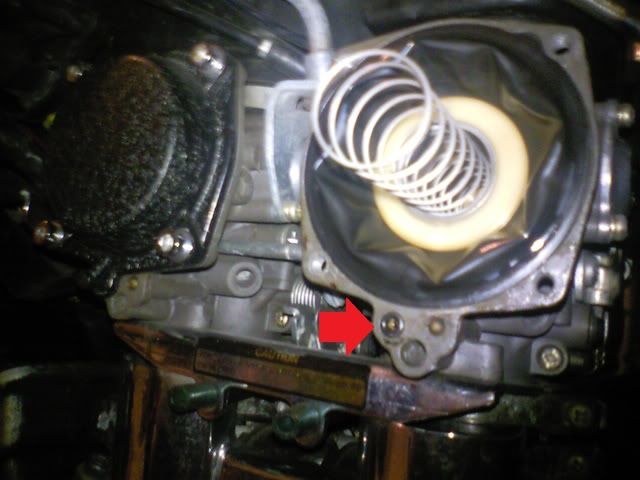
Pull the spring out and set aside.
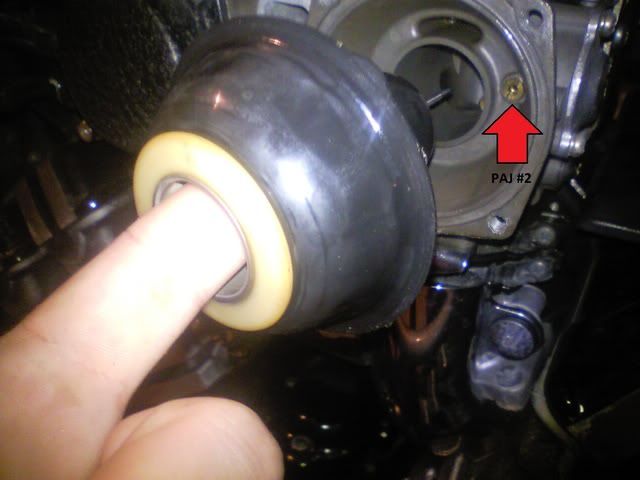
Remove the diaphragm/slide assembly from the carb. DO NOT pull on the diaphragm. Stick a finger inside the slide, gently lift up, then pull the slide out. You may have to gently peel the diaphragm away from it's seat if it's been in there a long time. Once the diaphragm is free, pull it straight out. The jet you can see that lives behind the diaphragm is the Pilot Air Jet #2, or PAJ2. This also has a strong influence on the midrange, but also has an effect on both idle and high speed. It's an air jet, so smaller jet= less air= richer, and vice versa.
Now the slide is out, look inside. Again, avoid touching the diaphragm at all, hold it by the plastic body. You'll see a big plastic screw, like this. Remove it.
Now that the screw is loose, cup your hand, and "dump" the contents of the slide into it. You'll get the needle/spacer/clip, a washer, a spring, and the plastic screw. This illustrates how they go back together.
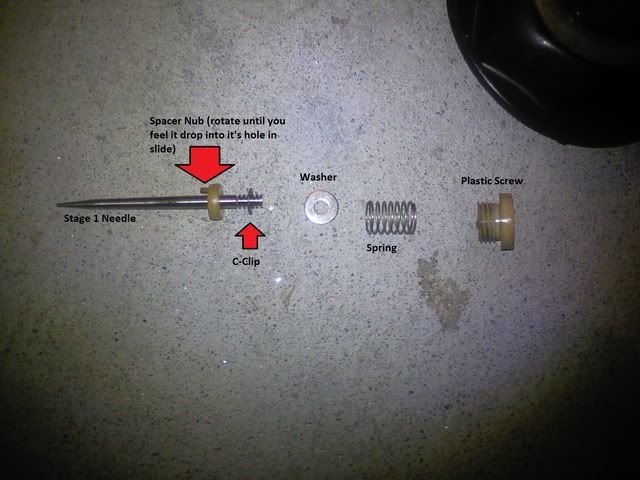
Grab the needle and slide the plastic spacer off it, leaving just the clip. Here's the only slightly tricky part of this operation...using a poor method to remove or reinstall the c-clip results it it rocketing off across the work area never to be seen again. This happened using needle nose pliers(after 20 min I found the clip). I now use a pair of channel locks to firmly grip the c-clip, then pull the needle straight out so as not to bend the clip. Then push the needle back into the clip on your desired position. Closer to the pointy end= richer midrange. Closer to the flat end= leaner. One clip can make a big difference, so when trying to tune something in, move only one clip at a time.
After the clip is where you want it, slide the plastic spacer back on, with the pointy "nub" on the spacer pointing the same way as the needle (as shown in picture). Slide it all the way up so it's flush against the clip, give it a little twist to make sure it's fully seated. Now grab the slide/diaphragm, and drop the needle into the center. Once it's in, give it a little shake and the needle should drop through the hole. Hold the slide steady, and rotate/gently pull down on the needle until you feel the nub on the spacer drop into it's hole. Now grab the washer, and drop it into the center also. More often than not it lands perfectly on top of the clip. If not, give it a little shake until it seats itself. Now drop the spring on top of it. Finally, drop the plastic screw in there. Guide it into place using your screwdriver and put it back in.
I spray a little light oil (WD40 or something similar) on the side for the re-install. Again, put your finger in the middle, and slide it straight back into the carb. Once it's almost in, make sure the detent in the carb lines up with the nub on the diaphragm, like this:

Lightly press the diaphragm back into it's seat, the put the spring back in. Ensure the o-ring is in place, and re-install the cover. There is a ring on the inside of the cover to hold the spring in place, make sure it goes inside the spring.
That's it. Easy, right?
Adjusting your needles is a good way to pinpoint your adjustments on the midrange of the bike, from around 3-6000 RPM or so. If you have problems focused in this area like bogging or hesitation, this is a good place to start.
I do these one carb at a time. So you have to repeat this process four times in all. Once you've done it a couple times, you can do all four in 15 minutes.
Start by removing both scoops, this makes the top two bolts much easier to get at.
Remove diaphragm cover. The bolts on mine took a 4mm hex key. I believe stock bikes have one anti-tamper screw, which you might have to vise-grip off if you don't have a bit for it. As you loosen the last bolt on the cover, hold it in place with a finger. There's a big spring behind it and a little bit of tension.
As you remove the cover, hold one hand like a cup underneath it. This is to catch the o-ring in case it falls out. On my bike none of them have ever fallen out, but on my Yamaha snowmobile they always fall out, so it's kind of hit and miss. If you re-assemble without the o-ring you'll have all sorts of problems, so take care not to lose it.
After the cover is removed, this is what you'll see. Note the o-ring is still in place here on the carb body.
Pull the spring out and set aside.
Remove the diaphragm/slide assembly from the carb. DO NOT pull on the diaphragm. Stick a finger inside the slide, gently lift up, then pull the slide out. You may have to gently peel the diaphragm away from it's seat if it's been in there a long time. Once the diaphragm is free, pull it straight out. The jet you can see that lives behind the diaphragm is the Pilot Air Jet #2, or PAJ2. This also has a strong influence on the midrange, but also has an effect on both idle and high speed. It's an air jet, so smaller jet= less air= richer, and vice versa.
Now the slide is out, look inside. Again, avoid touching the diaphragm at all, hold it by the plastic body. You'll see a big plastic screw, like this. Remove it.
Now that the screw is loose, cup your hand, and "dump" the contents of the slide into it. You'll get the needle/spacer/clip, a washer, a spring, and the plastic screw. This illustrates how they go back together.
Grab the needle and slide the plastic spacer off it, leaving just the clip. Here's the only slightly tricky part of this operation...using a poor method to remove or reinstall the c-clip results it it rocketing off across the work area never to be seen again. This happened using needle nose pliers(after 20 min I found the clip). I now use a pair of channel locks to firmly grip the c-clip, then pull the needle straight out so as not to bend the clip. Then push the needle back into the clip on your desired position. Closer to the pointy end= richer midrange. Closer to the flat end= leaner. One clip can make a big difference, so when trying to tune something in, move only one clip at a time.
After the clip is where you want it, slide the plastic spacer back on, with the pointy "nub" on the spacer pointing the same way as the needle (as shown in picture). Slide it all the way up so it's flush against the clip, give it a little twist to make sure it's fully seated. Now grab the slide/diaphragm, and drop the needle into the center. Once it's in, give it a little shake and the needle should drop through the hole. Hold the slide steady, and rotate/gently pull down on the needle until you feel the nub on the spacer drop into it's hole. Now grab the washer, and drop it into the center also. More often than not it lands perfectly on top of the clip. If not, give it a little shake until it seats itself. Now drop the spring on top of it. Finally, drop the plastic screw in there. Guide it into place using your screwdriver and put it back in.
I spray a little light oil (WD40 or something similar) on the side for the re-install. Again, put your finger in the middle, and slide it straight back into the carb. Once it's almost in, make sure the detent in the carb lines up with the nub on the diaphragm, like this:
Lightly press the diaphragm back into it's seat, the put the spring back in. Ensure the o-ring is in place, and re-install the cover. There is a ring on the inside of the cover to hold the spring in place, make sure it goes inside the spring.
That's it. Easy, right?
Last edited: