


BOM88
Well-Known Member
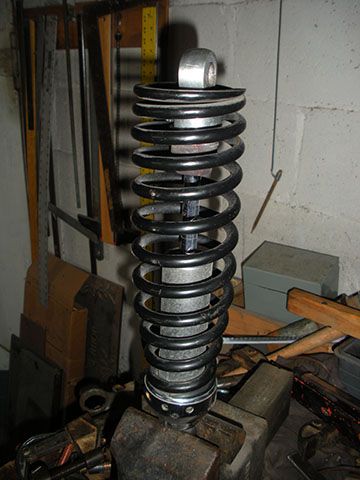
I'm trying to black out a majority of my max and its been a long process and one of the last pieces are the rear shocks. I don't mind the stock feel but I do mind the chrome and slight rust. I thought if I could disassemble the rear shocks it would be easier to paint/powder coat the parts i needed to get the look I wanted. This would be a lot cheeper than purchasing a new/used set of black progressives. This thread is the disassembly portion, but once I paint everything I will post the reassembly...
Tools needed....
Big vice
Cresent wrench
pipe clamps and some angle iron or a small spring compressor
pick/small needle pliers
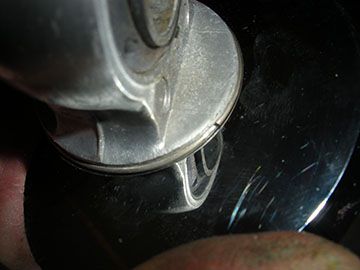
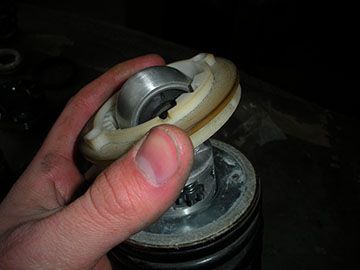
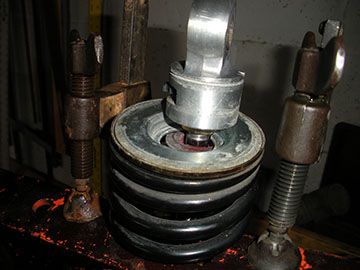
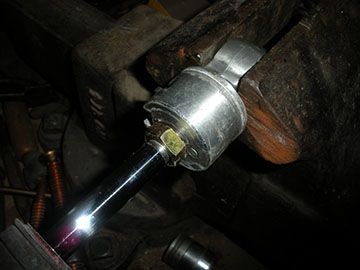
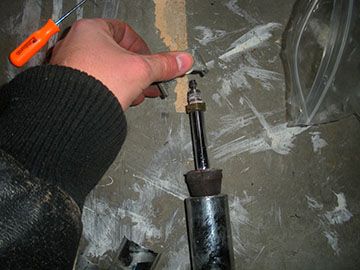
Step 1: Push down on the damper adjustment to find the retaining ring/snap ring and use a pick or needle pliers to remove....
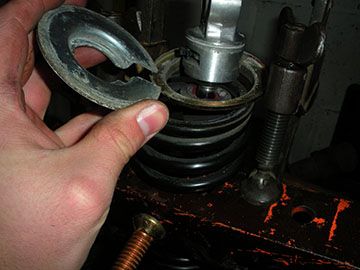
Step 2: Start removing the pieces one by one... Damper adjustment(chrome cover) then the large rubber washer

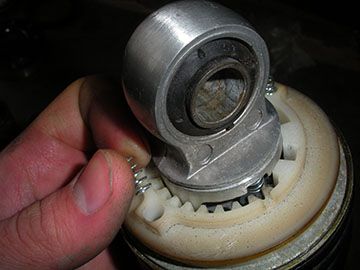
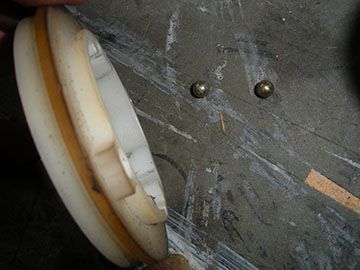
Step 3: Watch out for the small springs... under those are little steel balls
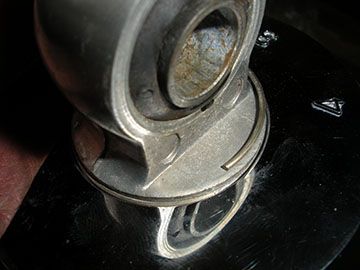
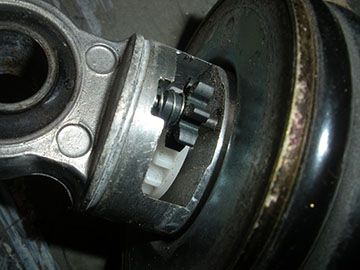
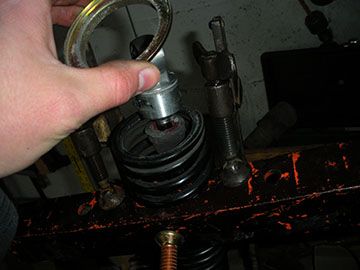
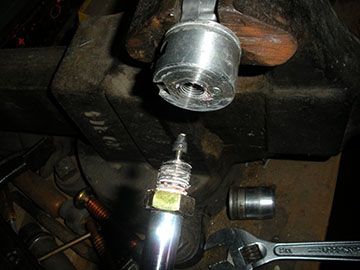
Step 4: You will notice a notch in the (i'm calling it a spring retaining plate) this is how that part will slide out.
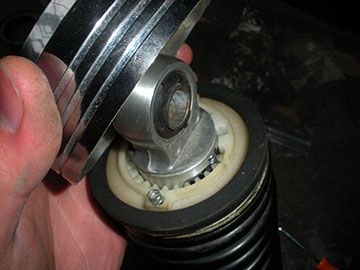
****side note: This is the gearing for the damper adjustment. If you move the black gear you will hear clicks each click is a different setting 1-4. Keep in mind when everything goes back together you install the chrome cover at the 4 position. So prior to installing that cover you will set this gear to the hardest setting then put the chrome cover on. This will have to be done prior to installing the spring so you can check the resistance of each setting to determine the 4 position. Each setting is very distinctive sort of like the shindy steering damper adjustments if you have a steering stabilizer.
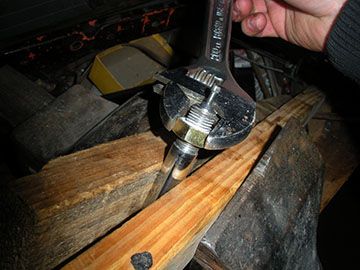
Step 5: Now its time to compress the spring, I made up this really dangerous spring compressor that I don't recommend but I managed to come out alive... I know Harbor Freight sells a small compressor that might work, or if your handy you can weld up something that will work and is safer. For reinstallation, I may come up with something a little easier so I don't damage any parts.
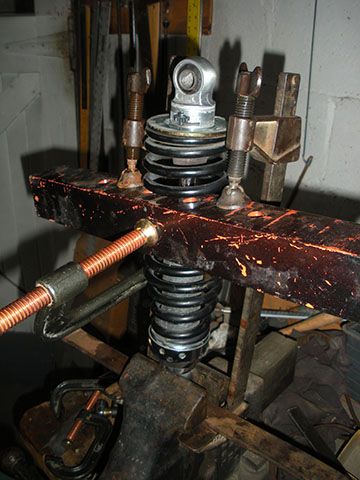
Step 6: Slowly crank down on the clamps to compress the spring enough to remove the "spring retainer plate"
Step 7: Remove the washer and loosen the clamps...
Step 8: relax go drink a beer....
Step 9: Remove spring... if you just needed to PC/paint the spring then this is really where the adventure ends no need to go any further. If your like me and wanted to get down to the removal of the rubber bumper then keep scrolling
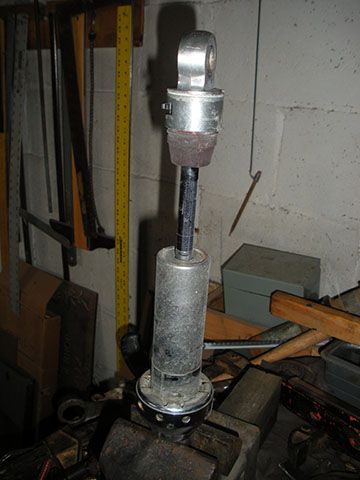
Step 10: Pull the Preload adjuster up and off of the shock be careful not to damage the black plastic gear as you do it.
Step 11: Slide the preload "steps" up to expose the cover plates, those to pieces just fall right off as they are being held together by the step piece
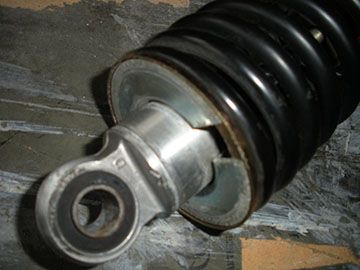
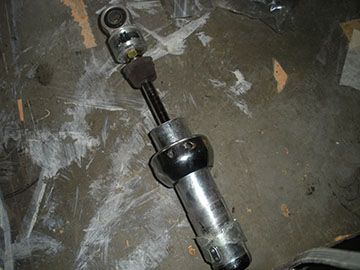
Step 12: There is a nut that holds the top mount at a certain distance. Basically the damper gears will not turn properly if the mount is threaded on the inner shock stanchion to far and its easy to tell if you have tightened to much... all of this is good info for reassembly
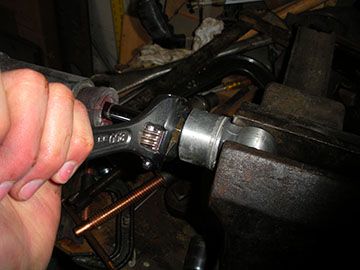
Step 13: Clamp the Mount in a vice and loosen the bolt in the direction of the bottom of the shock until the thread stops, at this point the entire lower end of the shock will start spinning and the upper mount will loosen up
***Side note: I don't know if the top pieces in the second picture can pull out if your feeling daring you can try but I didn't see a reason to
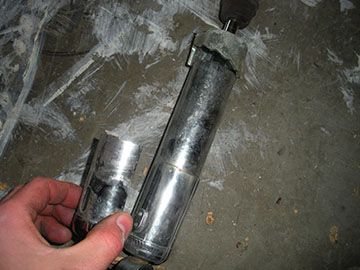
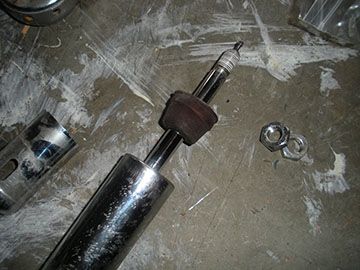
Step 14: Now its time to clamp the inner shock stanchion between to pieces of wood so you can loosen the nut off of the shock.
Step 15: You can now remove the pre load "steps" and the little rubber bumper
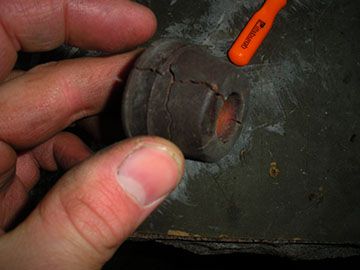
Now heres my question for the readers..... My rubber bumpers are very worn and cracked, any suggestions for replacements? Im going to look around, hardware stores and whatnot to see if I can find a hard rubber piece that will fit. This part's only purpose is to keep the shock from bottoming out it seems.
***side note: on the angle iron I used for the compressor, I cut a notch with a air cutter so that my clamps were more centered on the spring. The "C" clamp in the picture is holding the angle iron to the spring so it doesn't fly out and hit me in the face.... Once again, its dangerous I don't recommend it but it worked
Tools needed....
Big vice
Cresent wrench
pipe clamps and some angle iron or a small spring compressor
pick/small needle pliers
Step 1: Push down on the damper adjustment to find the retaining ring/snap ring and use a pick or needle pliers to remove....
Step 2: Start removing the pieces one by one... Damper adjustment(chrome cover) then the large rubber washer
Step 3: Watch out for the small springs... under those are little steel balls
Step 4: You will notice a notch in the (i'm calling it a spring retaining plate) this is how that part will slide out.
****side note: This is the gearing for the damper adjustment. If you move the black gear you will hear clicks each click is a different setting 1-4. Keep in mind when everything goes back together you install the chrome cover at the 4 position. So prior to installing that cover you will set this gear to the hardest setting then put the chrome cover on. This will have to be done prior to installing the spring so you can check the resistance of each setting to determine the 4 position. Each setting is very distinctive sort of like the shindy steering damper adjustments if you have a steering stabilizer.
Step 5: Now its time to compress the spring, I made up this really dangerous spring compressor that I don't recommend but I managed to come out alive... I know Harbor Freight sells a small compressor that might work, or if your handy you can weld up something that will work and is safer. For reinstallation, I may come up with something a little easier so I don't damage any parts.
Step 6: Slowly crank down on the clamps to compress the spring enough to remove the "spring retainer plate"
Step 7: Remove the washer and loosen the clamps...
Step 8: relax go drink a beer....
Step 9: Remove spring... if you just needed to PC/paint the spring then this is really where the adventure ends no need to go any further. If your like me and wanted to get down to the removal of the rubber bumper then keep scrolling
Step 10: Pull the Preload adjuster up and off of the shock be careful not to damage the black plastic gear as you do it.
Step 11: Slide the preload "steps" up to expose the cover plates, those to pieces just fall right off as they are being held together by the step piece
Step 12: There is a nut that holds the top mount at a certain distance. Basically the damper gears will not turn properly if the mount is threaded on the inner shock stanchion to far and its easy to tell if you have tightened to much... all of this is good info for reassembly
Step 13: Clamp the Mount in a vice and loosen the bolt in the direction of the bottom of the shock until the thread stops, at this point the entire lower end of the shock will start spinning and the upper mount will loosen up
***Side note: I don't know if the top pieces in the second picture can pull out if your feeling daring you can try but I didn't see a reason to
Step 14: Now its time to clamp the inner shock stanchion between to pieces of wood so you can loosen the nut off of the shock.
Step 15: You can now remove the pre load "steps" and the little rubber bumper
Now heres my question for the readers..... My rubber bumpers are very worn and cracked, any suggestions for replacements? Im going to look around, hardware stores and whatnot to see if I can find a hard rubber piece that will fit. This part's only purpose is to keep the shock from bottoming out it seems.
***side note: on the angle iron I used for the compressor, I cut a notch with a air cutter so that my clamps were more centered on the spring. The "C" clamp in the picture is holding the angle iron to the spring so it doesn't fly out and hit me in the face.... Once again, its dangerous I don't recommend it but it worked
 unk:
unk: