What did you do to your Vmax today? Part 2

VMAX  Forum

Help Support VMAX Forum:

This site may earn a commission from merchant affiliate links, including eBay, Amazon, and others.
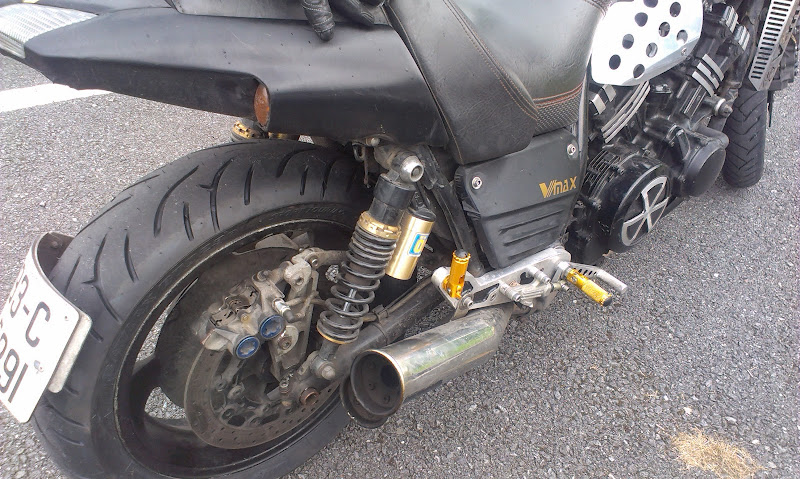
Got the braced swingarm and new wheel on the back, didn't realize that stabbing the drive shaft into the u-joint would take 4 hours... But I did it... Now to scrape some more money together haha

I had a similar experience my first time, and now for some reason, I don't have the problem. Maybe it's just getting familiar w/the 'feel' of the parts, because it surely isn't due to being-able to see them! It's like seeing one of those vintage ISDT guys change a flat rear tube (not a mousse tube substitute!) in four minutes. They've had a lot of practice.
 
I played around with some of the maps for the ignitec TCI. I made the V-boost TRULY RPM based.

I also broadened the part throttle curves.
 

Attachments

  • Advance RPM.jpg
    Advance RPM.jpg
    52.4 KB · Views: 18
  • Servo rpm.jpg
    Servo rpm.jpg
    52.8 KB · Views: 22
I had a similar experience my first time, and now for some reason, I don't have the problem. Maybe it's just getting familiar w/the 'feel' of the parts, because it surely isn't due to being-able to see them! It's like seeing one of those vintage ISDT guys change a flat rear tube (not a mousse tube substitute!) in four minutes. They've had a lot of practice.
Having not slept for 48 hours and then drinking a few beers while getting everything taken apart probably didn't help... Haha
 
Finally got my fork seal problem sorted out, the third seal this year! Went to belray 10wt and only put in 5 1/2" down from top of fork per directions for progressive springs, also found a little nick on the fork tube and sanded it with 2000 grit paper. Put it all back together rode 70 mi and no leaking. I'm very happy but what a headache.
That's good news Lee, I'm glad you found the source of the issue!:clapping:
 
Got both my handlebar master cylinders apart and soaking in PineSol. Should have them repainted and rebuilt in about two or three weeks. Paint I use takes a week to cure but is impervious to brake fluid. Got new Handlebars (Drag bars from Sean) mounted. Nice fit for me.
 
I re-installed my carbs after a good cleaning and rebuild. I almost can't believe it, but it started up with no trouble, whew! runs beautifully after a quick carb sync. Replaced all coolant hoses and started to install my new Sandybikespares stainless exhaust and decided to wait and just ordered the front downpipes as well, I'll do it all at once next week sometime.
 
That looks exactly like the one I have. LED? Anyway, when the brakes are on the brake light is just barely brighter than the tail light, I don't know why.

Check this threat out Dman used a resister 100... to make it brighter.
I'm only using it as a running. I have brake lights hook up all ready.
 
That looks exactly like the one I have. LED? Anyway, when the brakes are on the brake light is just barely brighter than the tail light, I don't know why.
As jagco1 said, I added a 100 ohm resistor to the running light wire to dim it a bit and now there's a much bigger distinction between the running and brake light.
http://www.vmaxforum.net/showthread.php?t=34804

jagco1 posted some more pictures of his install in that thread also.
 
Picked up my Vmax, just got new tires

IMAG2199.jpg
IMAG2198.jpg


Tires €260, Labor €65

Plus public transport for a day, that comes out at about $460 your money!
 
Nothing special, Bridgestone BT-023 110/80-18 & 160/60-17

That's exactly what I am using. I like 'em! Very confidence-inspiring. It rains here, a lot in the summer, though I don't ride in the rain much if I can help it. Yes, a "fair-weather biker."
 
I remembered I had an old AutoMeter shift light from another project that I wasn't using. I made up a bracket that bolts up to the back of the speedo mounting bracket. I'm waiting for the paint to dry then final install and wiring.

80832479-625A-4CC7-A1A1-02A6957C9DDA.jpg

4B8085E0-038C-4845-A35D-0101E12875B7.jpg

6DBBA228-68AE-431A-B586-DCB4D89D1002.jpg

B5C7B91A-1E5B-4246-B8F0-FEC357BAA9CB.jpg


Later, Doug
 
I removed my cat eye tail light and painted the inner fender black then re-installed it and moved my plate up a little and angled it so the plate light actually hits the plate now.
I also removed my damaged supertrapp and beat out the slight dents from my accident and sanded and repainted it.
I'll be pulling the other supertapp for sanding and repainting tomorrow.
It's slowly but surely getting it all repaired and back together.
 

Attachments

  • Right-Rear-Running-Light-LP-Moved-Up.jpg
    Right-Rear-Running-Light-LP-Moved-Up.jpg
    60.4 KB · Views: 26
  • Rear-Off-LP-Moved-Up.jpg
    Rear-Off-LP-Moved-Up.jpg
    47.7 KB · Views: 27
  • Supertrapp-Left-Side-Repaired-Painted.jpg
    Supertrapp-Left-Side-Repaired-Painted.jpg
    41.7 KB · Views: 28
  • Crushed-Supertrapp-1.jpg
    Crushed-Supertrapp-1.jpg
    70.4 KB · Views: 12
  • Crushed-Supertrapp-2.jpg
    Crushed-Supertrapp-2.jpg
    58.4 KB · Views: 10
Last edited:
I almost traded my bike for this beauty. Anyone know what it is? I do...:ummm:
 

Attachments

  • Tree Bike.jpg
    Tree Bike.jpg
    154.5 KB · Views: 42
Back
Top