Geek_Law's V-Max Transformation

VMAX  Forum

Help Support VMAX Forum:

This site may earn a commission from merchant affiliate links, including eBay, Amazon, and others.
Ok, this is a bit silly, but I'm gonna do a post for the front blinkers. This is really too easy, because there are already holes up there to mount the blinkers, and also the front blinkers have 3x wires which accommodate running lights, so it's seriously plug and play.

Anyway, I didn't want to take apart the head light to get to the wire source for the blinkers, so instead, I bastarized the front blinkers thinking nobody would likely want them. I removed the bolt in the middle and pulled (reallly hard) the lens portion from the mount portion, and exposed the wires right behind the OEM light socket. I clipped the 3x wires there, and tada ... I had electrics.

So then I just finished removing the OEM post to expose the bolt hole, put 3x crimp ends on the 3x wires, and then grabbed the new blinker. I don't remember which wire was which, but basically, take the three wires and just see what works. Leave the blinker off, so that you can find the HOT wire and the RUNNING light wire.

Get the new blinker to light solid, and then try the other wire to bounce back and forth between the BRIGHT fiiliment and the WEAK or DIM filiment, and then, of course, choose the DIM filiment to wire up to the running lights, and also wire in the hot wire, preferrably with your little crimp ends.

Finally, flip on the blinker just to make sure you've got everything right, and verify that the blinker activates the THIRD and final wire which should be the BRIGHT filiment. Connect the crimps, bolt in the blinker, and tuck the wires back with zip ties or electrical tape, or whatever.

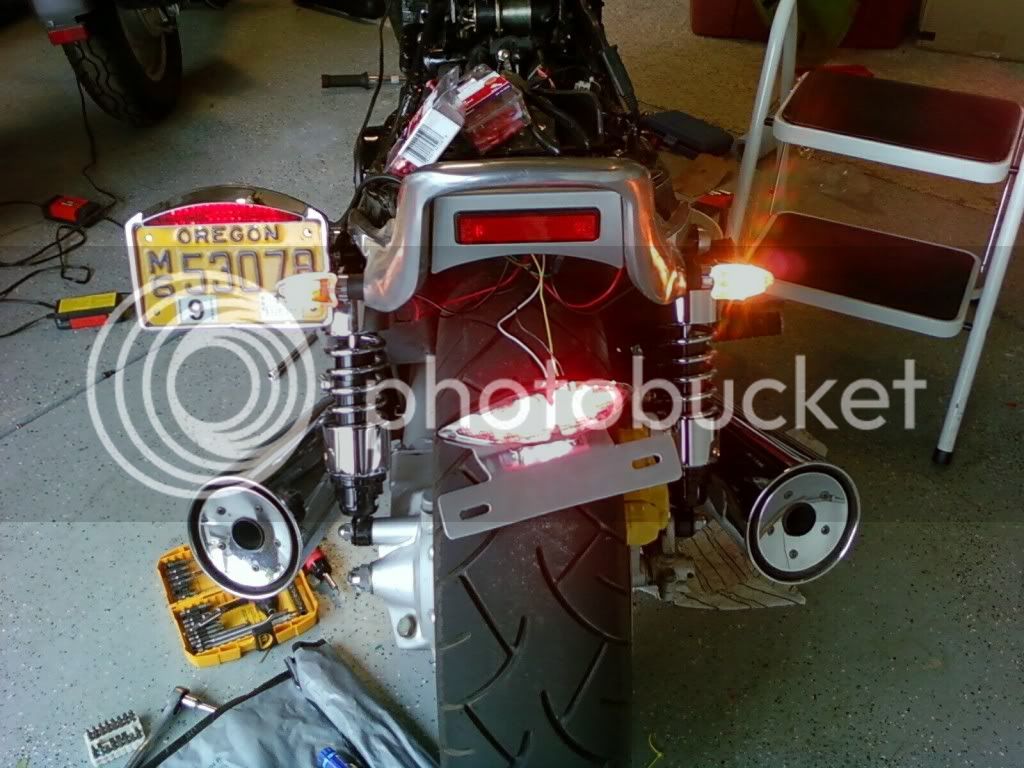
So this is seriously easy, and cheap, and a pretty cool little bit of customization over the HUGE lollipop style blinkers. Here is a pic showing both styles at once on the bike. There are lots of types of blinkers available, so don't be afraid to make a change.

Oh, I should note, if you go with LED blinkers, you have to play some magic tricks to get the resistance high enough to make the bike happy. I won't go into those issues here, but I used traditional filiments and the whole thing couldn't have been easier.

Here are those pics. In one pic, you see only the running light on each, and in the other pic, the new blinker is brighter because the blinker is actually activated, and the OEM lollipop is still on the running light only.

1257032867.jpg


1257032862.jpg


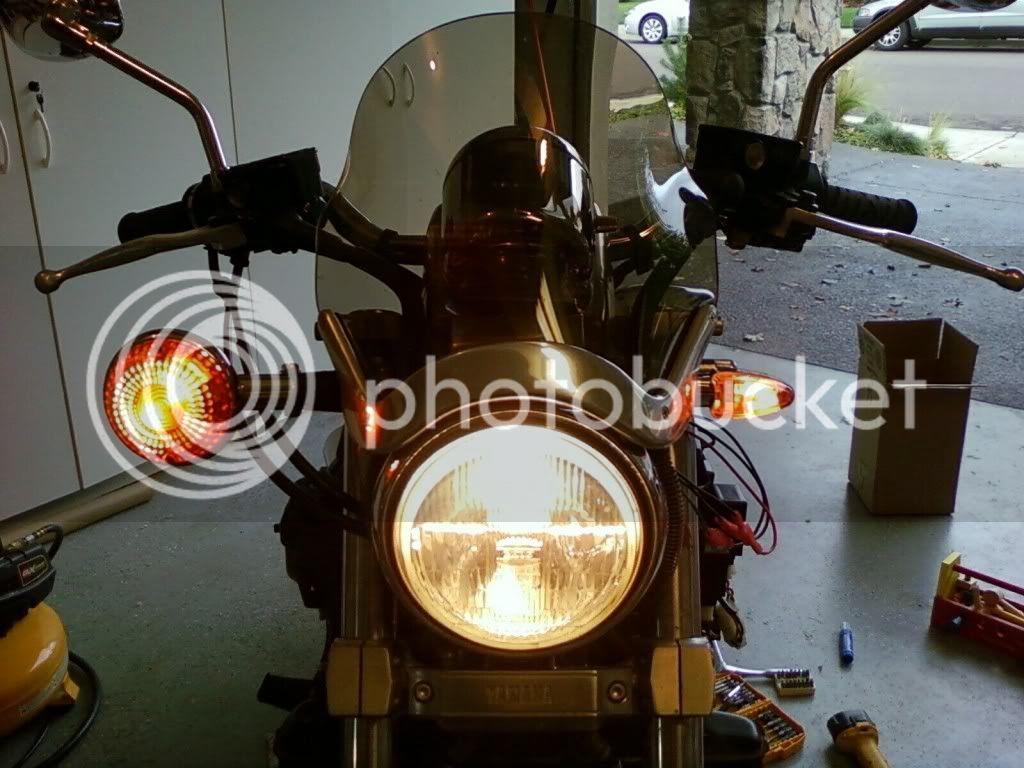
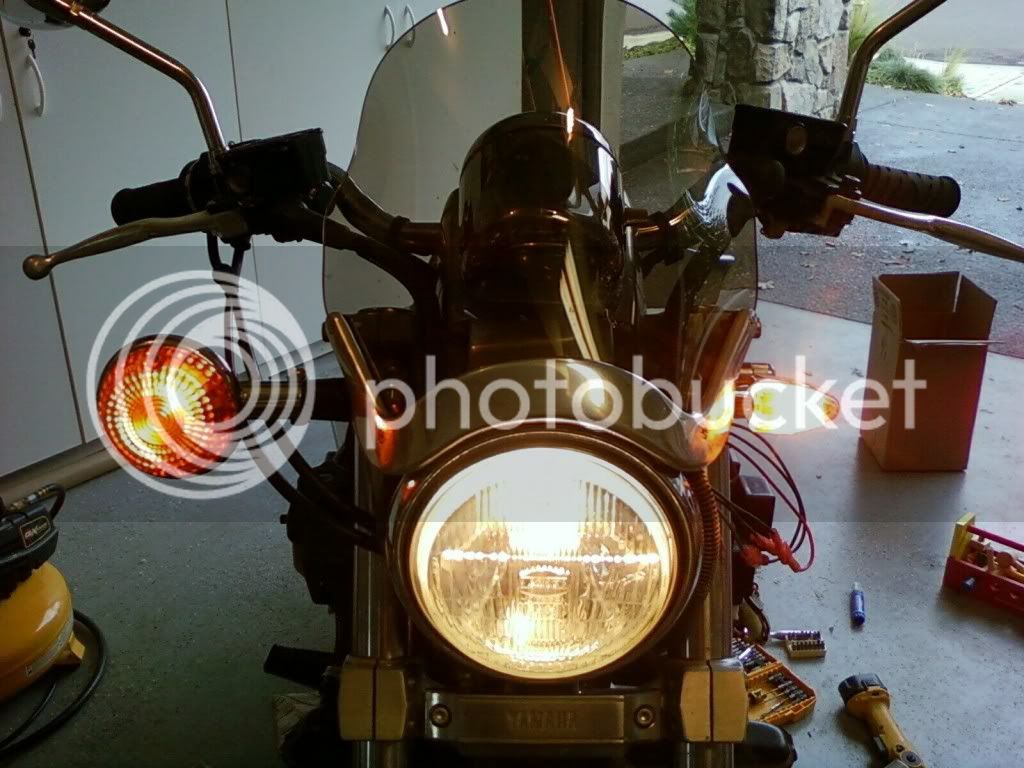
Obviously I'm doing both, but this gives you a good idea of the type of difference in the look. I'm a safety first guy, so I can happily say that these are every bit as bright and visible when being used, but don't look nearly as silly when you'll just tooling down the road.

Hopefully this can help others who are afraid to start cutting wires and ripping apart their blinkers. Good luck!
 
I think I have exactly the same blinkers installed and they really look great.
Got them from ebay one year ago for a very good price.
They really look fine even if they're in plastic chromed.
 
Ok, last but not least, the rear brakelight/tail light and ALSO the horizontal license plate mount. Each was a 3x wire pure LED system, and I wired each up to the bike so that I had running lights on each and then both would activate BRIGHTER with the brakes. So I basically have two brake lights now. One on the actual brake light, and then the horizontal license plate mount too, lights up brighter when the brakes are applied.

As I noted above, I'm a safety first guy, and I like to be seen. I didn't see any issues with doing this per the Oregon Revised Statutes, but I don't have a clue about your state. But if you can genuinely state that you are trying to be safer and more visible, that is a very valid legal defense should anybody give you any crap if you do what I did.

Oh, the horizontal license plate also has a couple of clear LEDs facing down onto the plate itself, but those were wired into the RUNNING light, so I didn't have to do anything special.

Well, I don't have the tail light mounted, so that could be interesting, but the electrics were very simple, because the OEM brake light already had a 3x wire system. So All I did was find the HOT, the RUNNING LIGHT, and then the BRAKE LIGHT wires coming out of the rear loom.

The BLUE wiire as it turns out was the RUNNING light. The BLACK wire was HOT, and the YELLOW wire was the actual BRAKE LIGHT wire, so it only comes on when you pull the front or rear brake levers.

Well, if you read any of my above posts, you get the idea. Just try a couple of combinations to make sure you have it straight, throw on some fancy little crimp ends, and hook the stuff up. I love my license plate mount. I really looks sharp on the side of the bike and I like the extra visibility it provides.

I like the brake light too, and like that it's a super bright LED jobber, but I don't have it physically mounted as of yet, so that could prove interesting.

Anyway, here are some pics to give you an idea of what you can do for fairly cheap. I think I paid something like $40.00 or so for the license plate mount, with lights and everything, total package. I think I paid just $25.00 for the rear brake light. It has a license plate holder too, and white downward lights, but I'm not going to use those, since I have the separate mount for the plate. So maybe $70.00 at the most, and a bit of time and you can really clean up the back end of the bike.

Here are the pics. Similar to the above, one with the BRIGHT brake lights on and one with just the DIM running lights on.
1257031048.jpg


1257031043.jpg
 
I think I have exactly the same blinkers installed and they really look great.
Got them from ebay one year ago for a very good price.
They really look fine even if they're in plastic chromed.


Cool. I agree completely. They really do look sharp, despite being just cheepies from Ebay. The are plastic chrome, but you cannot tell by looking. Now I have not used them in situ yet, but I'm sure they will be fine, and heck, worst case scenario, I have to buy new ones and throw them on.


Oh, so I still have to wire in the STEBEL Horn, which I have on my rocket and I absolutely LOVE. I'll be sure to do some good pics for that, because I've seen a few people asking some questions about the relay and how to make it work.

It's a deadly serious horn, it works great, yes you need a relay, not it is not hard, yes you can separate the compressor from the horn, but you don't have to, and yes, again, it is seriously LOUD. I'm excited to get it rigged up to the max. The toughest part is figuring out where to actually stash the thing.
 
That's funny I have the same plate holder too but mounted on your tail light place.
Great item too :)
I was thinking about the same horn or a wolo one.
But I guess I will need to change the full wiring of it since the previous owner did a mess when he added a 2 truck horns. Super loud but heavy and not really a nice sound.

Unless I put 2 stebel horns, that will mean I'm really mad at the car drivers.
 
You should be able to do the Stebel, so long as the OEM horn switch is still working. Just find the two leads for it, and cut EVERYTHING else out.

Then you just rune those leads (from the OEM horn) to the relay as your activate signal, and then a couple of wires to the battery to pull some proper juice and then to your new horn. Stated differently, if they used the original horn, you should just be able to hack the whole mess out, just as if you were bypassing the OEM horn.
 
thanks for the tip, doesn't look complicated :)
I also saw a nice thread in here, explaining the setup connecting to the existing harness.
But I like the direct connection to the battery, better way to keep all clean.
 
STATUS UPDATE:

Not too much progress as of late on the bike. All the blinkers are wired up and physically mounted, just need to tuck back the wires.

I had some leaking radiator fluid coming from the water pump cover, so I had to sand down the mating surfaces, but then everything sealed right up.

I've had the bike running for a good bit of time, and don't see any oil leaks whatsoever, which is great news, considering that I had all the engine case covers totally removed. The exhaust is even back on and everything seems to be completely operational.

I don't have any brakes right now, because I don't want to bleed the old lines since I'm getting new yellow lines soon from Sean, but that's ok because I cannot ride the bike anyway right now with out all the tins.

The big news however is .... drum roll ... the painter finally is done with the parts, or so he says, and so I'm driving up to Washington tomorrow to pick them all up. It will be really cool to see all the tins. I think he's had them for at least a month. I'd have to go back and look.

Anyway, assuming I get those parts, I should have a mostly reassembled bike this weekend, and can then work on mounting the tail light, and tucking in all the electrical wires and connections, as well as get the horn installed.

Then its just a matter of brake lines, and tweaking whatever else decides to break in the interim. It's very very close now!!!
 
cant' wait to see the final outcome bud!

make sure u check for exhaust leaks.
 
Also if you're gonna bleed all your lines, and you have new calipers anyway, you may wanna consider using silicon-based brake fluid as it doesn't absorb moisture and also doesn't strip paint like normal fluid does!

I believe the silicon fluid is known as DOT 5.
 
The suspense is KILLING me!!!!!!!!:bang head:

Judging by your other rides it is going to be GREAT!!!!!!!:eusa_dance:
 
STATUS UPDATE:

Well, the painter came through and had the parts ready. We drove up to Washington on Saturday morning and collected the parts. Here's a pic of them laid out on a Tweety Bird blanket, which is fitting match for the color I think.

1257635215.jpg
 
STATUS UPDATE:

Got the painted parts all on and the tail light mounted as well as some other stuff like the grips and touching up some chipped black paint. I'll add some comments later, but here are some pictures for now. There are some things that still need to be done, and some things that I don't like, but I think its 90% of the way finished.
 

Attachments

  • SSPX0983.jpg
    SSPX0983.jpg
    99.3 KB · Views: 48
  • SSPX0984.jpg
    SSPX0984.jpg
    72.9 KB · Views: 55
  • SSPX0985.jpg
    SSPX0985.jpg
    101.1 KB · Views: 52
  • SSPX0986.jpg
    SSPX0986.jpg
    69.5 KB · Views: 44
  • SSPX0987.jpg
    SSPX0987.jpg
    78.9 KB · Views: 44
  • SSPX0988.jpg
    SSPX0988.jpg
    87.2 KB · Views: 46
  • SSPX0989.jpg
    SSPX0989.jpg
    75.5 KB · Views: 35
  • SSPX0990.jpg
    SSPX0990.jpg
    67.5 KB · Views: 34
  • SSPX0972.jpg
    SSPX0972.jpg
    74.8 KB · Views: 34
  • SSPX0976.jpg
    SSPX0976.jpg
    104.5 KB · Views: 36
  • SSPX0980.jpg
    SSPX0980.jpg
    60.3 KB · Views: 35
STATUS UPDATE:

Got the painted parts all on and the tail light mounted as well as some other stuff like the grips and touching up some chipped black paint. I'll add some comments later, but here are some pictures for now. There are some things that still need to be done, and some things that I don't like, but I think its 90% of the way finished.

That looks Awesome!!!! I do love the yellow scheme..Great job so far!!!
 

Latest posts

Back
Top