It sounds as though you need to remove the caliper & disassemble it to clean the pistons & the body. You can usually re-use the seals after a good cleaning, but if the wide outer seal, the dust seal is deteriorated, replace it/them. A good brand of brake cleaner in a spray can is OK, but be-sure to wear eye protection when you spray-clean the parts & use compressed air to blow-dry the pieces.
I have used a grease gun before to free a stuck piston. SInce you're going to disassemble the caliper anyway, it doesn't make any difference about the grease being injected via a grease gun into the caliper. Last time I used this was on my Lake Orion, MI friend's CBR600 F2, we couldn't get one piston to move using compressed air or the brake fluid, but a few squirts w/a grease gun into the bleeder nipple, and that stuck piston came right-out.
I often use a Dremel to clean the corrosion, using a variety of brushes to clean all traces of corrosion from the caliper body and pistons, including a flapper wheel. Clean everything well, use a bit of brake fluid on the square inner o-ring, and you should be able to hand-assemble the calipers' pistons individually back-into the caliper body, no c-clamp required. Be sure the square-profile o-ring land in the caliper body has absolutely no signs of any corrosion before reassembly.
It's no big deal to disassemble a caliper for cleaning, but make sure you torque the screws to their correct value, and a bit of thread locker is in-order.
To disclose the factory manual's instructions, it says, "never loosen the bridge bolts." Those are the bolts holding the caliper halves together. Whether or not you want to do my method is up to you, if you feel uneasy about it, then take the calipers to your shop after dismounting them and let them work on the calipers for you and give them back to you ready for placement back-onto the fork legs and bleeding.
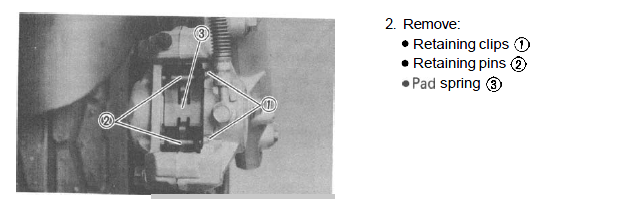
For the pins the pads slide-on, just clean them well w/a wire wheel, sandpaper, or whatever you need. I have never used any grease on them. For the back of the pads, if they squeal you can use some of the brake pad goo to stop them from vibrating, but that's the function of the thin stainless shims. The manual says, install the pad springs w/the longer side in the direction of the wheel rotation. You will see one side of the shim has a wider width than the other, as they sit on the top of the pads, see the manual for an illustration.