Here's a brake bleeder syringe you can make from easily-obtained parts. What you need:
Clean-up the syringe hole, remove any rough edges of plastic. I used a bench grinder but you could probably do the same thing in a bit more time with sandpaper. You want a smooth round hole.
Cut the neoprene flat washer to fit the inner diameter of the syringe body. You will note the syringe has a bit of a taper at the bottom.
Disassemble all the parts of the valve stem, including removing the schrader valve. You do have a valve stem removal tool in your toolbox, don't you? If not you should be able to buy a good quality one like Victor, from and auto parts store for probably < $2. If you have a Snap-On valve stem removal tool, you have more money than I do! As an aside, inner tubes used to come with a valve cap that had a molded-in valve stem removal tool on one end, but I haven't seen such a piece in some time.
Take your trimmed neoprene washer and slide it over the naked valve stem. It should lay flat and flush with the flange at the bottom of the valve stem.
Now place the narrow valve stem end into the syringe (you removed the plunger to drill the hole, it should still be separate) and the small threaded end should come through the hole you drilled in the bottom of the syringe body. You can use a small narrow screwdriver inserted into the syringe hole, and slip the narrow end of the schrader valve over the screwdriver, to make it easy to get the schrader valve through the syringe hole.
Now place the thick, heavy vinyl/rubber valve stem seal onto the valve stem and it should rest on the wider threaded base of the valve stem, and against the outside bottom of the syringe.
Place the metal flange for the valve stem next-to the seal you just installed. It has a 'cup' (concave/convex) shape, make sure you put the shallow 'dished' surface (the concave side) against the vinyl/rubber washer.
Now place the schrader valve nut onto the valve stem. It attaches to the wider bottom threaded portion of the valve stem. Hand tighten it until the rubber/vinyl seal distorts slightly. The valve stem should now be snug in the syringe, and shouldn't move or rotate easily.
Replace the syringe plunger into the syringe body.
Place a 4 inch piece of 1/4" i.d. tubing onto the small threaded end of the valve stem. Slide it up about 1/2"-3/4".
Use the hose clamp on the opposite end of the 1/4" i.d. tubing. Tighten it down so that when you slide it over a brake bleeder nipple, you don't have leaks. Of course, this can also be used for your clutch slave cylinder bleeder, the nipples are the same.
Some people like to use the spring-loaded brake bleeder nipples, your choice.
Now you're ready to "reverse-bleed" anything with a bleeder nipple. I find pushing the brake fluid up from the bottom nipple helps to eliminate any air pockets, and to dislodge any sediment that may have accumulated in the sealed system.
Some words of advisement:
After every use of the syringe, disassemble the syringe by removing the plunger, and thoroughly use some solvent to rinse the plunger rubber seal, and the portion of the plunger exposed to brake fluid. This will ensure a decent life span for your syringe. Of course, also use the solvent to clean the inner barrel of the syringe. Use a paper towel to dry everything for storage. You do not need to disassemble the schrader valve from the syringe body. Let everything air-dry before storing it. I usually place it into a not-closed ziplock bag and store it in a clean location in my shop toolbox storage.
Because DOT 3 and DOT 4 are corrosive to paint, be sure that you have something on-hand to clean-up any spills that inevitably occur when brake or clutch bleeding. Paper towels and carb cleaner in an aerosol can are usually what I use to remove any spilled brake fluid. Draping the area under the master cyl with an old terrycloth towel, to cover the bike is a good way to go. Remember that if you have a considerable spill, the towel may become saturated, and come into contact with painted surfaces, and cause paint decay. Not good!
When doing the reverse-bleed, you need to remove the master cyl cap to keep an eye on the brake fluid as it accumulates in the master cyl. A Big Word of Caution! Vigorous pressure on the syringe plunger will probably cause a mini-geyser of brake fluid from the small hole in the floor of the master cyl.! It can throw a delicate stream of corrosive fluid many feet! If you have another vehicle next to your bike when you're working on it, move it out of the way until you're done. That 427 1967 Corvette Tri-Power (attachment) paint job doesn't deserve that treatment of a golden shower.
I usually start the reverse-bleed by using the syringe to remove all but a thin amount of fluid from the master cyl. If the fluid is opaque remove it all, use the syringe to get what you can and absorb the rest w/ a paper towel. If your fluid has turned to goo and isn't liquid, you can try getting out as much as possible and then add fresh fluid, and see what happens. You may see the goo dissolves in the fresh brake fluid, so you can use the syringe to remove it. If the fluid area is dry white powder, instead of liquid, you may need to disassemble the master cyl plunger and thoroughly clean everything. Lube the master cyl bore and the plunger rubbers w/fresh brake fluid upon reassembly.
Discard properly the removed fluid, do not re-use it in the reverse-bleed process. The fluid is probably loaded with water (brake fluid is 'hygroscopic,' it absorbs water vapor, which lowers the fluid boiling point) and particulate matter, that's what causes the fluid to go from clear to opaque/dirty. I leave enough fluid in the master cyl to cover both the big and small holes in the floor of the master cyl.
I use the wheel chock/vise on my Handi-lift bike lift to hold the bike centered and upright. You could use your centerstand and be sure the bike front wheel is straight ahead, and isn't against the fork stop on the bottom triple tree. This allows you to allow a decent amount of brake fluid to accumulate in the master cyl reservoir as you reverse-bleed.Those of you with Kerker 4/1 exhausts surrendered the centerstand for that great sound. Use a rear wheel bike stand, or jack-up the front, and secure the wheel straight-ahead, using some bike tie-downs.
Remember what I said about the geyser of brake fluid spraying from the open master cyl reservoir, if you press too-quickly on the plunger! Something that I've had occur, is that (especially) when the fluid collecting in the reservoir is opaque as you push the brake fluid upwards, you may get some sediment in there, that can block/obstruct/occlude the small reservoir hole especially. This is the one that can make like 'Old Faithful,' if you aren't careful. Follow this procedure to limit the geyser:
Once you're done, check all your fittings for tightness, be sure you've cleaned up all spilled fluid, and then take a slow test ride away from traffic to ensure all systems are functional according to factory specs.
I usually leave the fluid in the reservoir about 2/3-full, and keep an eye on the reservoir window. If your reservoir window is in-need of replacement, visit your local watch repair jeweler, and get a new crystal sized to fit your opening. A crystal should last the life of your bike, and is more-durable than a plastic replacement you find on ebay. Careful dis-assembly of the window will allow you to re-use the pieces with a bit of JB Weld. There really is negligible pressure on the window, it just has to be liquid-tight.
About brake fluid: DOT 3 and DOT 4 are compatible. DOT 4 has a higher boiling point. DOT 5 is NOT compatible with DOT 3 or DOT 4! However, there is a DOT 5.1, and because that is also glycol-based like DOT 3 and DOT 4, DOT 5.1 is compatible with both DOT 3 and DOT 4. A reference: https://www.summitracing.com/expertadviceandnews/professoroverdrive/answer/414
If you want to use a vaccum-type bleeder, this is a Robert Bosch company, OEM supplier to worldwide auto industry manufacturers: https://actron.com/content/hand-vacuum-pump
Mityvac is another manufacturer, I have one of theirs too, that must be 35 years old. It is made of plastic, the Actron is made of brass, and I think is more-durable, and repair parts should be available for a long time. You can buy a 'one-man brake bleeder' reservoir at your local auto parts store, to add to the Actron vacuum tool, for about $8. MItyvac makes their current vacuum bleeding tool in both plastic and die-cast potmetal, it's available at Sears and other retail outlets. Here is a good value if you want one of the die-cast metal vacuum units w/a lot of accessories: http://www.sears.com/mityvac-mv8500-silverline-elite-automotive/p-SPM11628927015?plpSellerId=CPO Outlets&prdNo=1&blockNo=1&blockType=G1 It lists for $66. You might check your local store, if you have 'Shop Your Way' points, that price could drop considerably. I saw them in-stock at my local Sears tool section yesterday in both plastic and metal, I would buy the metal one for longevity.
If you get the steps done above and don't have a firm lever, the master cylinder piston could be bleeding internally. That's rebuild time, or master cylinder replacement. A rebuild kit from Yamaha for either the brake or clutch from the resource below is probably $30-40. If you have a 1985 or other early model and the factory website says, "obsolete or unavailable, " just source your part from the 2007 model microfiche. They are the same 5/8 inch bore part for all models. This works for other parts too, just be aware of the few things thad did change, like the ignition box, the front end tube diameter, 2 brush to 4 brush starter, etc.
If you discover brake fluid dripping off the far end of your lever, you need a master cylinder rebuild kit. Fluid is bypassing the seal which is held in place by an internally-expanding circlip. You don't need a pair of long nose circlip pliers to remove the circlip. I usually just use a strong long steel pick in the circlip end hole, pulling towards the center to unseat it from the groove. Once you get one end out, you can easily remove the other. Check the cylinder bore for wear, because if you still have a leak after reassembly its time for a new master cylinder. That's probably $150 online from someplace like Ron Ayres Motorsports Yamaha.
I think that covers most of the points about using a reverse-bleed system. Please add-on your own techniques/comments.
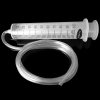
- a large capacity syringe, I think the bigger the better. 60 ml medical syringe or a 1-1/2 fluid oz (approximately) general purpose syringe. For this, I used a syringe used for injecting juices into a roast, from the supermarket. Look in the kitchen housewares by the meat dept. The brand I got was Farberware.
- a bolt-on schrader valve of the type you would use on a mag wheel
- a neoprene flat washer about 1" in diameter
- a small hose clamp for 1/4"-5/16" tubing
- a clear plastic length of 1/4" I.D. tubing. Buy 3 feet as you can use the excess for brake bleeding
- safety glasses
Clean-up the syringe hole, remove any rough edges of plastic. I used a bench grinder but you could probably do the same thing in a bit more time with sandpaper. You want a smooth round hole.
Cut the neoprene flat washer to fit the inner diameter of the syringe body. You will note the syringe has a bit of a taper at the bottom.
Disassemble all the parts of the valve stem, including removing the schrader valve. You do have a valve stem removal tool in your toolbox, don't you? If not you should be able to buy a good quality one like Victor, from and auto parts store for probably < $2. If you have a Snap-On valve stem removal tool, you have more money than I do! As an aside, inner tubes used to come with a valve cap that had a molded-in valve stem removal tool on one end, but I haven't seen such a piece in some time.
Take your trimmed neoprene washer and slide it over the naked valve stem. It should lay flat and flush with the flange at the bottom of the valve stem.
Now place the narrow valve stem end into the syringe (you removed the plunger to drill the hole, it should still be separate) and the small threaded end should come through the hole you drilled in the bottom of the syringe body. You can use a small narrow screwdriver inserted into the syringe hole, and slip the narrow end of the schrader valve over the screwdriver, to make it easy to get the schrader valve through the syringe hole.
Now place the thick, heavy vinyl/rubber valve stem seal onto the valve stem and it should rest on the wider threaded base of the valve stem, and against the outside bottom of the syringe.
Place the metal flange for the valve stem next-to the seal you just installed. It has a 'cup' (concave/convex) shape, make sure you put the shallow 'dished' surface (the concave side) against the vinyl/rubber washer.
Now place the schrader valve nut onto the valve stem. It attaches to the wider bottom threaded portion of the valve stem. Hand tighten it until the rubber/vinyl seal distorts slightly. The valve stem should now be snug in the syringe, and shouldn't move or rotate easily.
Replace the syringe plunger into the syringe body.
Place a 4 inch piece of 1/4" i.d. tubing onto the small threaded end of the valve stem. Slide it up about 1/2"-3/4".
Use the hose clamp on the opposite end of the 1/4" i.d. tubing. Tighten it down so that when you slide it over a brake bleeder nipple, you don't have leaks. Of course, this can also be used for your clutch slave cylinder bleeder, the nipples are the same.
Some people like to use the spring-loaded brake bleeder nipples, your choice.
Now you're ready to "reverse-bleed" anything with a bleeder nipple. I find pushing the brake fluid up from the bottom nipple helps to eliminate any air pockets, and to dislodge any sediment that may have accumulated in the sealed system.
Some words of advisement:
After every use of the syringe, disassemble the syringe by removing the plunger, and thoroughly use some solvent to rinse the plunger rubber seal, and the portion of the plunger exposed to brake fluid. This will ensure a decent life span for your syringe. Of course, also use the solvent to clean the inner barrel of the syringe. Use a paper towel to dry everything for storage. You do not need to disassemble the schrader valve from the syringe body. Let everything air-dry before storing it. I usually place it into a not-closed ziplock bag and store it in a clean location in my shop toolbox storage.
Because DOT 3 and DOT 4 are corrosive to paint, be sure that you have something on-hand to clean-up any spills that inevitably occur when brake or clutch bleeding. Paper towels and carb cleaner in an aerosol can are usually what I use to remove any spilled brake fluid. Draping the area under the master cyl with an old terrycloth towel, to cover the bike is a good way to go. Remember that if you have a considerable spill, the towel may become saturated, and come into contact with painted surfaces, and cause paint decay. Not good!
When doing the reverse-bleed, you need to remove the master cyl cap to keep an eye on the brake fluid as it accumulates in the master cyl. A Big Word of Caution! Vigorous pressure on the syringe plunger will probably cause a mini-geyser of brake fluid from the small hole in the floor of the master cyl.! It can throw a delicate stream of corrosive fluid many feet! If you have another vehicle next to your bike when you're working on it, move it out of the way until you're done. That 427 1967 Corvette Tri-Power (attachment) paint job doesn't deserve that treatment of a golden shower.
I usually start the reverse-bleed by using the syringe to remove all but a thin amount of fluid from the master cyl. If the fluid is opaque remove it all, use the syringe to get what you can and absorb the rest w/ a paper towel. If your fluid has turned to goo and isn't liquid, you can try getting out as much as possible and then add fresh fluid, and see what happens. You may see the goo dissolves in the fresh brake fluid, so you can use the syringe to remove it. If the fluid area is dry white powder, instead of liquid, you may need to disassemble the master cyl plunger and thoroughly clean everything. Lube the master cyl bore and the plunger rubbers w/fresh brake fluid upon reassembly.
Discard properly the removed fluid, do not re-use it in the reverse-bleed process. The fluid is probably loaded with water (brake fluid is 'hygroscopic,' it absorbs water vapor, which lowers the fluid boiling point) and particulate matter, that's what causes the fluid to go from clear to opaque/dirty. I leave enough fluid in the master cyl to cover both the big and small holes in the floor of the master cyl.
I use the wheel chock/vise on my Handi-lift bike lift to hold the bike centered and upright. You could use your centerstand and be sure the bike front wheel is straight ahead, and isn't against the fork stop on the bottom triple tree. This allows you to allow a decent amount of brake fluid to accumulate in the master cyl reservoir as you reverse-bleed.Those of you with Kerker 4/1 exhausts surrendered the centerstand for that great sound. Use a rear wheel bike stand, or jack-up the front, and secure the wheel straight-ahead, using some bike tie-downs.
Remember what I said about the geyser of brake fluid spraying from the open master cyl reservoir, if you press too-quickly on the plunger! Something that I've had occur, is that (especially) when the fluid collecting in the reservoir is opaque as you push the brake fluid upwards, you may get some sediment in there, that can block/obstruct/occlude the small reservoir hole especially. This is the one that can make like 'Old Faithful,' if you aren't careful. Follow this procedure to limit the geyser:
- if you encounter increased resistance to pushing the fluid into the master cyl reservoir, STOP! You probably are pushing sediment into a partial or total blockage/obstruction/occlusion of those master cyl reservoir holes. What may happen is that you have now pressurized the closed system. When you remove the blockage/obstruction/occlusion by sticking a pin into the reservoir holes, the sudden release of pressurized fluid will shoot brake fluid many feet from your bike! You are wearing safety eyewear, yes?
- you can remove the syringe from the bleeder valve while the bleeder valve is open, and this should release the pressure in most cases. Now to clear the master cyl reservoir holes, you can use a pin or as davesax likes to recommend, a guitar string, I don't know what note string he recommends, something narrow. Once you believe the pressure is released, close the bleeder valve, and use the pin/guitar string to poke through the blockage/obstruction/occlusion in the master cyl reservoir holes,and resume the reverse-bleed. You may need to repeat this several times, as you purge entirely the old dirty/opaque fluid from the lines. What you want to end-up with is clear, clean brake fluid throughout the system. In the case of the front dual calipers, be sure to start with the left caliper as that's the furthest from the front brake master cyl reservoir.
- if after getting a lot of syringe plunger resistance (as in you cannot advance the plunger anymore) and trying the above methods to clear the pressure (first) and then the obstruction, you may have a tough blockage that requires disconnection of the components, and a thorough cleaning of them with compressed air. I use a rubber tip air hose appliance to blow-out the parts, once I remove the banjo bolts at the master cyl's and whatever system I am working-on, brake or clutch. At this point, for the front brakes, it's no big deal to remove the Yamaha emblem on the bottom front fork triple tree, exposing the brake splitter block. Remove the block, remove the banjo bolts, and use your air chuck to thoroughly purge the soft lines. Inspect the brake splitter block to ensure it's clean. In 50 years of working on hydraulic systems I've encountered a few cases of internally-collapsing hydraulic hoses, which act like a 1-way valve, allowing the system to pressurize, but not to release. This is one of those problems where leaving the bleeder open may not release the pressure from brake lever or clutch lever operation, or reverse-bleeding! Remember what I said about using protective eyewear? PPE, all the time (personal protective equipment).
- if you found a collapsed hose line, it's time to replace that, there's no 'saving' the piece for re-use. This would be a good time to upgrade to stainless steel hose lines. Remember that the stainless steel hose line metal weave is very abrasive, and if left unsecured and left in-contact with another surface, will wear-away the other surface (plastic, or die-cast, like aluminum) or will scratch it (any other metal, even chrome). Just zip-tying the SS hose line to your fork downtube isn't going to work, unless you sheathe it first in that plastic stuff used to encase electrical lines. GB electrical parts is the brand your local store probably carries. It comes in spiral, or slit-down the side, or you can use some heat shrink before installing your end hose fittings if you're using an earl's hydraulic fittings and line universal kit. You could also use a piece of narrow-i.d. fuel line, slip that over the hose before assembly, or slit it down the side, if you buy ready-made lines. Then that could be zip-tied to the bike.
Once you're done, check all your fittings for tightness, be sure you've cleaned up all spilled fluid, and then take a slow test ride away from traffic to ensure all systems are functional according to factory specs.
I usually leave the fluid in the reservoir about 2/3-full, and keep an eye on the reservoir window. If your reservoir window is in-need of replacement, visit your local watch repair jeweler, and get a new crystal sized to fit your opening. A crystal should last the life of your bike, and is more-durable than a plastic replacement you find on ebay. Careful dis-assembly of the window will allow you to re-use the pieces with a bit of JB Weld. There really is negligible pressure on the window, it just has to be liquid-tight.
About brake fluid: DOT 3 and DOT 4 are compatible. DOT 4 has a higher boiling point. DOT 5 is NOT compatible with DOT 3 or DOT 4! However, there is a DOT 5.1, and because that is also glycol-based like DOT 3 and DOT 4, DOT 5.1 is compatible with both DOT 3 and DOT 4. A reference: https://www.summitracing.com/expertadviceandnews/professoroverdrive/answer/414
If you want to use a vaccum-type bleeder, this is a Robert Bosch company, OEM supplier to worldwide auto industry manufacturers: https://actron.com/content/hand-vacuum-pump
Mityvac is another manufacturer, I have one of theirs too, that must be 35 years old. It is made of plastic, the Actron is made of brass, and I think is more-durable, and repair parts should be available for a long time. You can buy a 'one-man brake bleeder' reservoir at your local auto parts store, to add to the Actron vacuum tool, for about $8. MItyvac makes their current vacuum bleeding tool in both plastic and die-cast potmetal, it's available at Sears and other retail outlets. Here is a good value if you want one of the die-cast metal vacuum units w/a lot of accessories: http://www.sears.com/mityvac-mv8500-silverline-elite-automotive/p-SPM11628927015?plpSellerId=CPO Outlets&prdNo=1&blockNo=1&blockType=G1 It lists for $66. You might check your local store, if you have 'Shop Your Way' points, that price could drop considerably. I saw them in-stock at my local Sears tool section yesterday in both plastic and metal, I would buy the metal one for longevity.
If you get the steps done above and don't have a firm lever, the master cylinder piston could be bleeding internally. That's rebuild time, or master cylinder replacement. A rebuild kit from Yamaha for either the brake or clutch from the resource below is probably $30-40. If you have a 1985 or other early model and the factory website says, "obsolete or unavailable, " just source your part from the 2007 model microfiche. They are the same 5/8 inch bore part for all models. This works for other parts too, just be aware of the few things thad did change, like the ignition box, the front end tube diameter, 2 brush to 4 brush starter, etc.
If you discover brake fluid dripping off the far end of your lever, you need a master cylinder rebuild kit. Fluid is bypassing the seal which is held in place by an internally-expanding circlip. You don't need a pair of long nose circlip pliers to remove the circlip. I usually just use a strong long steel pick in the circlip end hole, pulling towards the center to unseat it from the groove. Once you get one end out, you can easily remove the other. Check the cylinder bore for wear, because if you still have a leak after reassembly its time for a new master cylinder. That's probably $150 online from someplace like Ron Ayres Motorsports Yamaha.
I think that covers most of the points about using a reverse-bleed system. Please add-on your own techniques/comments.
Attachments


Last edited: