1986 V-Max Restoration from Argentina

VMAX  Forum

Help Support VMAX Forum:

This site may earn a commission from merchant affiliate links, including eBay, Amazon, and others.
Note: the 86-93 ventures also used that style of engagement and we have yet to have one fail. I would say the gear problem was more rider then design.

Sean Morley

Thanks for the proper dog description Sean - I just couldn't resist :biglaugh:

My 86 is also shifting fine and 2nd has never popped out with almost 40k on the clock. It's the clutchless drag style shifts that killed those me thinks :confused2:
 
86 had the correct trans already in it. Early 85's were the problem ones.

Sean
 
These are the dogs, here in Argentina we call them "clanes".

attachment.php
 

Attachments

  • dogs.JPG
    dogs.JPG
    37.4 KB · Views: 184
:biglaugh:

---


Well I got Pink Eyes (conjunctivitis) :damn angry: so I cant do much to the max....


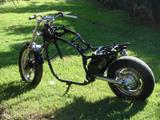
I Could give the frame and the gas tank one hand of epoxy....2 more to come...


The weather also is not good....its raining and is there to much humidity to paint....


hope you like it
 

Attachments

  • DSC02959 [1024x768].jpg
    DSC02959 [1024x768].jpg
    50.3 KB · Views: 35
  • DSC02954 [1024x768].JPG
    DSC02954 [1024x768].JPG
    125.6 KB · Views: 39
Looks good so far,

You can always try the paint process GM used for years to paint thier frames. They actually dipped the parts and then hung them to dry. It wasn't until recent years that the auto community learned how they did it. Normally you would think you would need a huge vat of paint to dip a part like a frame into as well as an enourmous quantity of paint much of which would be wasted.

What they finally learned was that Gm did use a huge tank BUT they filled the tank mostly with water. Then they slowly added in the paint which would for a layer on top of the water and float there. Take your clean dry part and slowly immerse it into the tank and withdraw it. The paint would stick to the clean dry part as it passed through it and stay stuck as it entered the water layer. Withdrawing it out slowly would keep the layers intact and not mess up the new layer.

I have never tried this method but thought that was a pretty slick way of getting a nice quick thick coating everywhere on the parts.

Sean
 
Wow....yes that is a good way to do it....!

Could try it in a small part to test it...!

Really painting a frame is much more difficult that I could ever thought..! :bang head:

too much difficult parts to reach...

But I can tell you that epoxy is a great paint, it?s almost plastic!...and no problems with brake fluids...gas, etc...

Another good paint for this things is polyurethane

thanks for the tip Sean
 
Some update...


New bearings front and rear forks...the old ones were totalled!!


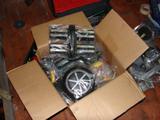
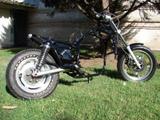
Fixing, cleaning and painting some parts...(up old, botton cleaned, adjusted, etc) Small things but all counts...


Starting to bolt thing together....(I will change the wheels when I finish her)


Cheers

Sebastian
 
Hey Sebastian. The Max is looking great. As I watch what you are doing it makes me regret letting my wrecked max go to salvage. I applaud your efforts and you will surely end up with a ride to be proud of. Don't forget to address the steering issues of this great bike. The first time I found out about it's natural tendencies was at speed and that is not the time for discovery. My new bike now has progressive springs in the tubes and 10w fork oil instead of the 5w. I have also added the aluminum washer in the neck and over torqued slightly until the wheel just falls slowly to the side without binding. I still think that there is more to do since this thing still has a slight tendency to wobble at slow speed but it is much better now at apex carving than my last one was. BTW: all the injuries except my wrist are better now. Shoulder and neck no longer require chemical assistance. LOL
Keep up the good work, my friend.:punk:

Scott

 
Well...some updates...

it?s been some month's since last one...

Finally after a lot of trouble with the engine, I could put all parts together and now have almost a v-max engine! jaja

Also, this poor yami, was more than 20 years of bad mechanics (more than me...jaja) and all in her was beaten, broken and badly treated. O-ring's were original from 1986..! not a good thing....there were fixed with teflon tape! :bang head: bolts with the thread smashed to fix the bad thread in the block and the list ok shit goes on and on....
Already bought all the bolts new in inox. Bought a Helicoil tool to fix the thread's...spend a real fortune buying orings..!! ( $20 total more or less. is that a fortune to spend?) bought all ball bearings for the gearbox... Undercut the transmission...etc, etc....
Well a lot of work...
Yesterday I have finally painted the engine! wow....what a new look for me...and really a personal price for a lot of work, money and too much dislikes.

Well.... Some of you know from some PM that this bike is important for me because it's a earth cable for some really bad problems I have with mi wife that died almost two years ago from a aneurysm while we were sleeping...
Time passes and one, has to put the mind in other things...and the max and particularly this forum help a lot for that. Really I would like to write more, but well....the language ....sometimes stops me...

what all want.....photos...!


Lapping the engine cases....

Before...


After...


Joining cases with Loctite 518..(couldn't buy Yamabond)


Morley's ARP Studs


Installing Cylinder Heads


Here you could see the fixed balancer shaft bearing...


Me, playing around with the engine....


Masking cases and engine part prior paint job...


Applying Wash Primer ....then Polyurethane...


Well hope you like it....!
 
Last edited:
Great work Bro,
I`m sure that you will have it put together and on the road very soon.
Just keepworking at it
the true prize is when you fire it up and synch the carbs and hearing it purr like a cat at low idle and when it roars like a lion at the twist of the throttle
yeah buddy.:eusa_dance:
<<Dave>>:punk:
 
Bravo Sebastian.
I really like to see that kind of work.
Keep it up ;)


Im meanwhile i've tosted my rebuilded engine LOL
For know i have 1300cc from Sean (thanks again for fantastic deal Sean).
Now i can tell that what is a real power.

I can see ARP head studs. Very good purchase. Definitly worth thier money.

Cant get Yamabond here also but again Sean came with help.

I've also painted mine engine with typical painting but i can tell you that it will not hold long. I've already found some paint detached.
Definitly powder coating is what i plan on winter.
Dont let any paint inside engine. It will detach and fall into lubricating system.

And you may want to machine an spin-on filter adapter.


Cheers
 
Thanks for the comments and kind words!!

Przemek, I thought painting the hole engine (disassemble) with powder coating, but not sure to put it in an oven at 300 ?c for some hours.... And don?t like to much the final look the other options of industrial painting for hi temp ...
I have not painted the internals...the black paint inside was from factory (??)
Uff...I'm really scared for rebuild engines...hope mine last's...I'm really sorry for that Przemek.
I?m really thinking for getting a spin-on filter adapter...!

thanks a lot!

Cheers

Sebastian
 
Hey Sebastian, Did you talk to Sean Morley about your crank? I know the Vmax has issues and I just want to make sure you won't have one. You may want to talk to him. Better now then after the engine is installed.

Looks great!

Sorry to hear WHY you're doing this rebuild. I can't imagine how much that hurts.

Chris
 
Back
Top