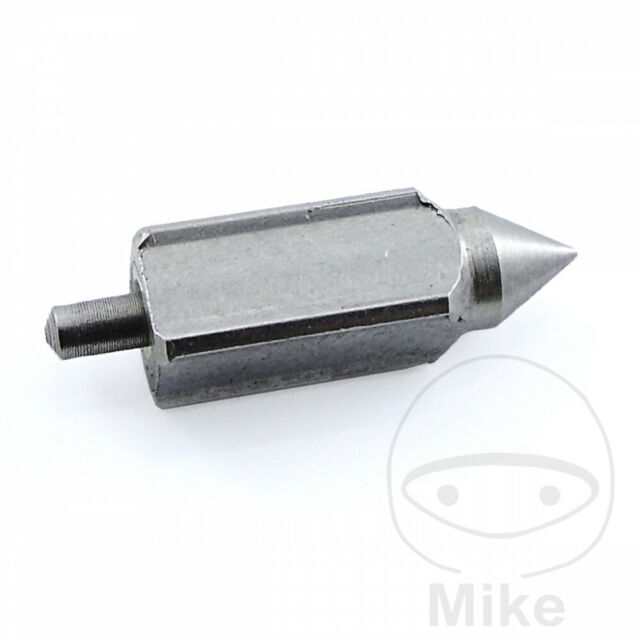
Here is a shot of the K&L needle valve seat. The bottom of the seat appears to have a very-slight taper, not a flat-bottom end-mill finish, the former which I suspect you would find in something machined to a relatively tight tolerance. It does not have a narrower taper duplicating the needle valve viton tip, so there would be more circumferential surface area of the viton tip sealing the orifice. In this aspect the drawing by
02GF74 appears to accurately show the type of seal the viton tip to needle seat possesses (the 'good-one').
The number of the set from K&L is 18-2879 and it's printed right on the envelope, "made in Japan." Assuming that truth in marketing is accepted, and after researching their website, I would say that the K&L stuff is OEM-equivalent, and possibly
is OEM, just under their name and not in a Yamaha package.
This is labelled as the 'economy' kit, available for $20 online if you look. It contains what I would consider the essential pieces, no jets/brass, other-than the needle valve and needle valve seat. The jet block gasket is there, usually something which tears upon disassembly. Also the starting enrichment casting gasket (#17,
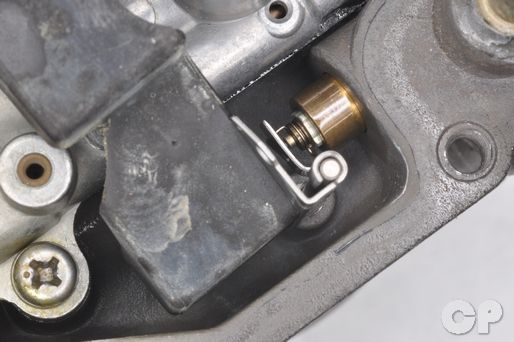
2006 Yamaha V-MAX 1200 (VMX12V) Carburetor | Ron Ayers ) is there. So-is the O-ring (#10 same fiche) for the CV diaphragm cap, known to run and hide as-soon as the CV diaphragm cap is removed, searching for some unknown space under your workbench to hide from you. The main nozzle (# 34) has a very-skinny O-ring (#33) which is also included (same fiche). The float bowl screw plug (#25) has an O-ring (#26) in the kit. Yes, 'same fiche.' The O-ring (#38) for the needle valve filter net (#37) is also included, it lies below the staked round cover (#39, simply called a 'cap') holding the needle valve seat and the needle valve filter net in-place. There is the O-ring (#40) for the float bowl drain plug (#41) which is just a tapered machine screw by the CV diaphragm caps, that's the one that pees the float bowl contents through the black rubber hoses sticking-through the the carburetor mounting brackets' left and right sides.
The cut gaskets appear to be of a rubberized material, which may be of longer duration than the paper gaskets used upon original assembly, and which may allow careful disassembly and re-use in the future. That bodes well for your next need to clear-out your pilot jets.
Be careful with how you treat and store this stuff, as the CV diaphragm caps, the starting enrichment die-cast body, and the carburetor mounting brackets L and R are no-longer available.


") I was slightly squashing the rubber at times of measurement and experience told me this was up to 0.1mm Lol.
I was slightly squashing the rubber at times of measurement and experience told me this was up to 0.1mm Lol.
 as I take my work too seriously and like to talk shop even in the pub.