Some things I did today to use-up stuff I had lying around including things I never made time to do:
- relocate horn so I can remount my crash bars (they're still not on!)
- new headlight (CAUTION!!! Component is from The Dark Side)
- Superbrace mounted
Headlight first.
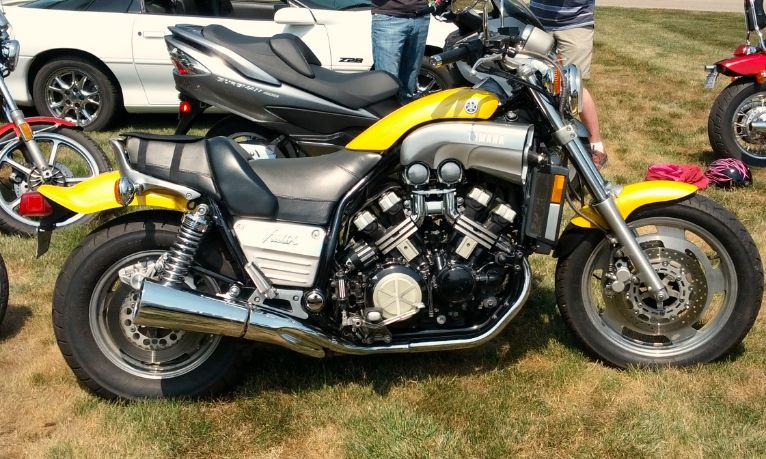
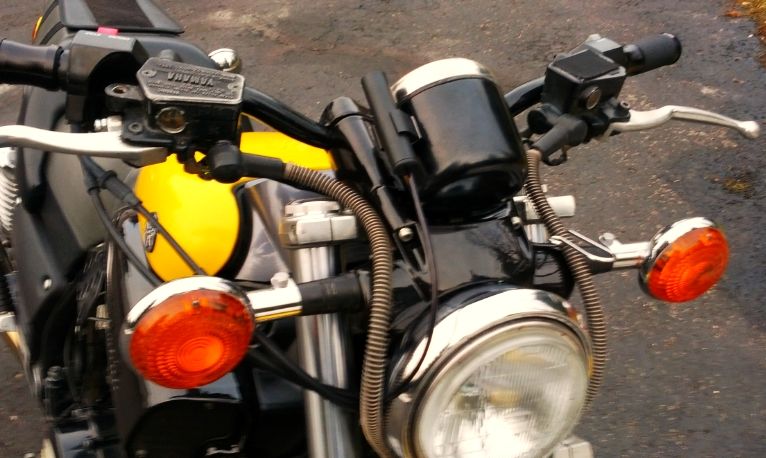
I bought an EMGO 7" headlight bucket, seal-beam & bezel on a closeout deal from my local shop in Dania Beach FL 33004,
Competition Cycle Center. Anyone who's been around bikes since the '70's-'80's will recognize the style, it was common on Japanese bikes of large-displacement. I stored the seal beam it came with and installed a halogen headlight/bulb in the EMGO bezel, it fit just-fine. I bought it off a guy who was changing the headlight on his Harley Dresser, it was used from the dealer to the ride home, and put onto a shelf, so, brand-new. The guy also had a Nissan GTR in the garage sharing-space w/the Harley.
I ordered some 43 mm downtube rubber-insulated headlamp mounts and ears off ebay when I couldn't find anything in the
Parts Unlimited catalog I liked. They are black and double clamp on the downtubes, and come w/black anodized hardware, but I swapped the bolts for some longer ones. What I like is the downtube bracket/sleeves have ~3/16" thick rubber gaskets for vibration protection.
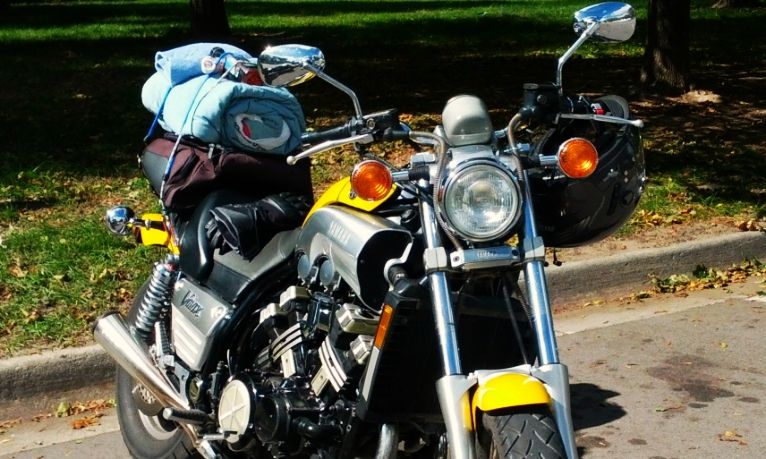
I dismounted the top triple tree to slide-on the headlamp mounting brackets, and the 'ears' use two-6 mm x 1.0 machine screws and nylok nuts to bolt everything up. I had to mount the headlamp brackets just-above the bottom triple tree to clear my stock Yamaha flyscreen at the top of the headlamp bucket. I used vise-grips (jaws wrapped w/tape) to pull together the brackets so I could use shorter bolts for securing the 'ears'. Some of the ears/brackets I saw aren't rubber insulated, or use a cheesy captive-tongue in a mating slot, and are held in-place w/only one fastener. "Pass!"
The only thing different from the stock headlight is there is no room inside the bucket for the turnsignal wiring & etc. usually found there, I am going to use a length of bicycle inner tube to surround all the electrical connections, and use a couple of Zip ties to cinch-down the ends of the bicycle tube to make the connections weather-resistant. Kinda like making sausage.
There is no additional bracket to hold the headlight aimed correctly, I am gonna run w/it & see how it holds-up, maybe I'll have to fab something to hold the headlight in adjustment. If you look at my pics, you'll see where I used some rubber & cloth-reinforced thick fender washers between the headlamp bucket and the 'ears.' That allowed me to gain an additional bit of vibration-damping for the bulb elements, and should hold the adjustment I set the headlight at for up & down trajectory, we'll see...
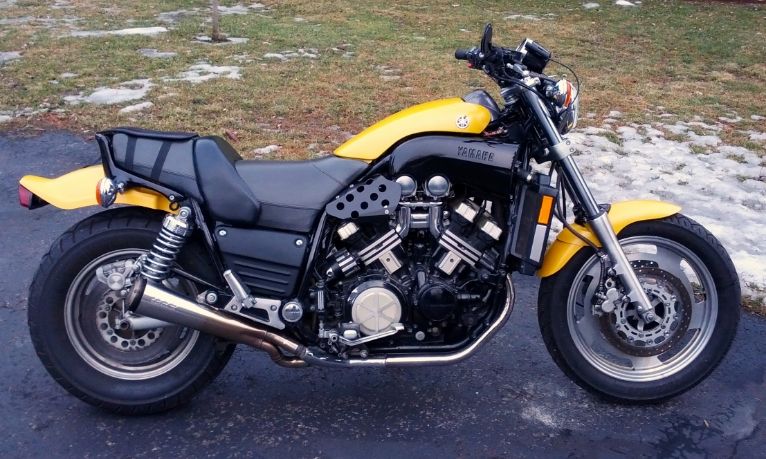
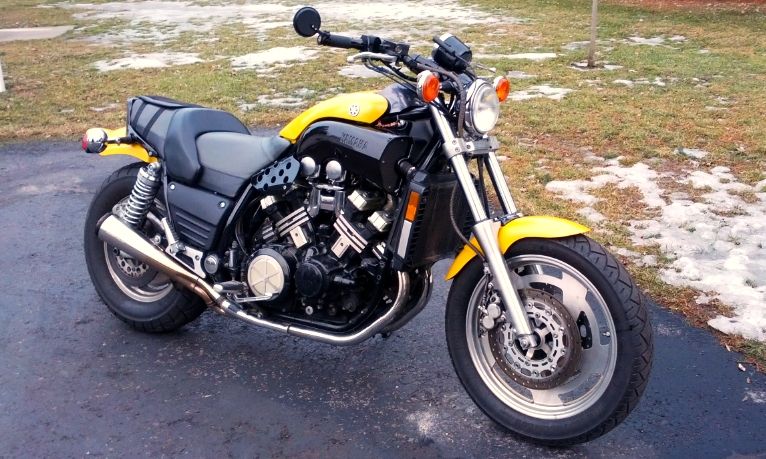
I also installed a Superbrace fork brace, purchased from another forum member, sorry, I forget who it was, but it came in great shape & included the SS allen-head screws. Since I installed my UFO 4/1 "Dragstar" recently, I 'lost' my centerstand. I used a floor jack at the front of the engine & a piece of board under the sidestand to maintain the bike's equilibrium while I removed the front axle. I had to remove that and the right FZR1000 4-pot caliper to get enough room to remove the fender. I didn't see any need to remove the wheel from the fork legs, removing the axle allowed me enough room to remove the fender mounting bolts to swap-out the stock brace for the Superbrace. I installed the front fender to it and then re-installed the axle and torqued-down the Superbrace SS allen screws last of all, to prevent binding from a misalignment of incorrectly tightening the SUperbrace
before the front axle/wheel was remounted. There is a shot showing the right caliper removed to be able to remove the wheel, and a shot of the tightening the Superbrace w/the axle/wheel installed.
I have a WOLO
Bad Boy airhorn, a copy of a Steibel, Harbor Freight sells 'em, I think they're about $40, a good investment, as it's self-contained, and I initially mounted it in-place of my left carsh bar. Today I made a bracket from an aluminum L-angle of about 1-1/2" and mounted it on the left "V" between the cylinders, in-place of the vanity covers over the VBoost plumbing. I soon saw that I was blocking the idle-adjustment screw, so I merely-swapped it to the right side of the engine, same place, leaving the idle screw free for adjustment. I did have to fabricate some short 'jumpers' from the stock horn leads as they were too-short; I used the encapsulated ones for the spade terminal ends. Yes, I'm gonna paint the bracket to make it 'disappear,' maybe some 'lightening holes' too for that steampunk/competition appearance.:biglaugh:
So, that's it.
Today's work:
- new 7" headlight
- new Superbrace
- new airhorn mounting
- oh, I touched-up the rear flat black rear of the front fender while it was off, I used the same paint I did the engine with recently after a sandblasting of the engine
And this is all on-top of:
- a fresh valve job
- undercut transmission
- new OEM gaskets/seals
- clearanced crankshaft
- Gannon's COP's conversion
- Dyna 3000 ignition box
- Dynojet Stage 7, complete install
- UFO Dragstar 4/1
- replaced stator and coil pick-up
- Ballistic Li-ion vanity battery
- new regulator/rectifier
- 17" X 5.5" Kosman rear wheel
- new Bridgestone radial tires
- new OEM front brake master cylinder
- FZR1000 4-pot calipers
- Russell SS braided front brake lines
- 298 mm OEM rotors
- 1993+ 43 mm front end, complete. I still have a set of Race-Tech springs & some RICOR's to install
- new clutch slave cylinder
- PCW extra-friction disc clutch kit, w/new OEM Yamaha friction discs and the PCW heavy-duty diaphragm spring
- fresh MOTUL full-synthetic motorcycle oil
I'm still on my first tank of gas since dropping-in the engine after the head work. I probably don't have 10 tanks through it since all that stuff listed above was done, about half of it was done within the last month.
A fitting ending to my unfortunate
dyno dilemma :damn angry: of awhile ago. Now to ride it for a bit, and then I'll strip it down the the frame, have it sandblasted and powdercoated. Daytona is beckoning this coming week, I hope to be there TH-SU.

unk:
Also here's a pic of the guy's bike Kyle scored some wire wheels for his drag bike off-of. I think he may have swapped the guy a Venture engine for the wheels. That's what it had in it, a 1300 Venture, w/VBoost. I saw him at
Competition Cycle Center while I was out for a shake-down cruise. He had a Kerker 4/1 which sounded good, even though I believe it's a Venture engine. He was riding w/his wife who had her own smaller Ninja. My UFO sounded louder though! He said he heard me approaching while he was still in the store, and came-out to see what was making all that noise.:biglaugh: I tried to depart at the same time he & his wife did, but he seemed in a hurry to leave before me. No opportunity there.